Introduction
So, you’ve chosen the Kadence Theme for your blog—great choice! It’s sleek, customizable, and beginner-friendly, making it an excellent foundation for any blogger looking to monetize their content. Speaking of monetization, one of the most popular ways to earn money from your blog is by setting up Google AdSense.
Google AdSense allows you to display ads on your blog and earn revenue whenever visitors click on or view those ads. The good news? Setting up Google AdSense with the Kadence Theme is straightforward and beginner-friendly, even if you’ve never done it before.
In this guide, we’ll walk you through the process step-by-step, ensuring you can get your ads up and running quickly. From signing up for AdSense to placing ad units on your blog, this tutorial will simplify the technical side of monetization, so you can focus on creating great content.
Whether you’re new to blogging or have already set up your site, integrating AdSense with Kadence can be a game-changer for growing your blog income. Ready to get started? Let’s dive into the process and set up your Kadence Theme for Google AdSense step-by-step.
Step 1: Sign Up for Google AdSense

Before you can start earning revenue from ads, the very first step is to sign up for Google AdSense. AdSense is one of the most popular and beginner-friendly ad programs available, and it allows you to display ads on your website and earn money when users click on or view these ads. Thankfully, signing up is a simple process, and in this step, we’ll guide you through everything you need to know to get started.
1. Understand Google AdSense Requirements
Before applying for Google AdSense, ensure you meet the basic eligibility criteria. Google typically requires the following:
- A Functional Blog or Website: You must have a well-structured, content-rich blog or website with useful, original content.
- Minimum Age Requirement: You must be at least 18 years old to sign up. If you’re under 18, you’ll need a parent or guardian to sign up on your behalf.
- Content Guidelines: Your blog must adhere to Google’s content policies. This means no illegal, inappropriate, or misleading content.
Kadence Theme is beginner-friendly and makes setting up a well-structured website easy, which will help you meet these requirements. If you’re unsure about your eligibility, reviewing Google’s AdSense program policies can help clarify your next steps.
2. Create Your Google Account (If You Don’t Have One)
To sign up for AdSense, you’ll need a Google account. Most people already have one if they use Gmail or other Google services, but if you don’t have one, you can create one quickly:
- Go to Google’s Account Creation Page.
- Follow the on-screen instructions to set up your Google account.
Once you have your Google account ready, you’re one step closer to signing up for AdSense.
3. Go to the Google AdSense Sign-Up Page
Now that you have your Google account ready, head over to the Google AdSense Sign-Up Page. Here’s how you can proceed:
- Click on “Sign Up” or “Get Started.”
- Enter your website URL (your Kadence blog’s domain name).
- Input your Google account credentials to sign in.
Google will then ask for additional information, such as your country or region and contact details. Ensure everything you enter is accurate to prevent delays in the approval process.
4. Review Terms and Conditions
After entering your information, you’ll need to review and agree to Google AdSense’s terms and conditions. Make sure to read these thoroughly to understand the policies, rules, and guidelines of participating in the AdSense program. If everything looks good to you, check the box agreeing to the terms and proceed.
5. Submit Your Application
Once you’ve completed all the necessary fields and reviewed the terms, click Submit Application. Google will then review your application to ensure your blog meets their requirements. This review process can take anywhere from a few days to a few weeks, depending on various factors like your blog’s content, design, and structure.
During this waiting period, ensure your Kadence blog has enough original, high-quality content that aligns with Google’s content policies. This will improve your chances of a faster and smoother approval process.
6. Monitor Your Email for Updates
After submitting your application, Google will notify you via email about the status of your application. Make sure you check your inbox (and spam/junk folder just in case) regularly for updates from Google. If approved, you’ll receive instructions on how to set up your Google AdSense account and connect it to your Kadence Theme.
If your application is denied, don’t lose hope. Review Google’s feedback, identify areas for improvement, and make adjustments to your blog before reapplying.
Final Thoughts
Signing up for Google AdSense is the very first step toward monetizing your Kadence blog. While the process is relatively straightforward, patience is key during the review period. Ensure your website is optimized, well-designed, and full of useful, original content to increase your chances of approval.
Once you’ve successfully signed up and are approved, you’ll be ready to integrate AdSense with your Kadence Theme and start earning money by displaying ads on your blog. So take a moment to complete this step carefully, and let’s move on to the next stage of setting up your Kadence Theme for AdSense!
Step 2: Set Up Your AdSense Account
Now that you’ve successfully signed up for Google AdSense (and your application is approved), the next step is to set up your AdSense account and prepare it to integrate with your Kadence Theme. This step involves configuring your AdSense settings, setting up payment information, and getting ready to connect the ads to your website. Don’t worry—it’s easier than it sounds!
1. Log In to Your Google AdSense Dashboard
Once your application has been approved, you’ll receive an email from Google letting you know you can now access your AdSense account. The first thing you’ll need to do is log in to your Google AdSense Dashboard at https://www.google.com/adsense/. Use your Google account credentials to sign in.
The AdSense Dashboard will serve as your main control center for managing your ads, tracking earnings, and configuring settings.
2. Complete Your AdSense Account Information
Before you can start displaying ads on your Kadence blog, you’ll need to complete your AdSense account setup by providing some additional information. Here’s what you need to do:
- Payment Information: Set up how you want to receive payments. Google typically pays you via methods such as PayPal or direct bank transfer. Head to the Payments section in your dashboard and add your bank details securely.
- Tax Information: Depending on your country, Google may require you to submit tax information. This is simple and can usually be found in the Payments section under Tax Information.
- Verify Your Address: Google may send a PIN to your mailing address to verify your identity. Keep an eye on your physical mailbox for this verification process.
Once you’ve added this information, your account will be fully set up and ready for monetization.
3. Set Up Your Ad Preferences
Google AdSense allows you to customize how ads will appear on your blog, so you’ll want to adjust your settings to align with your goals and audience. From your AdSense Dashboard, go to Ad Settings to make adjustments such as:
- Ad Layouts: Decide if you want responsive ads or fixed-size ads to fit better with your website design.
- Ad Categories: Choose whether you want certain ad categories to show or exclude certain types of ads from displaying.
- Ad Style: Customize the style and appearance of the ads to better match the look of your Kadence Theme.
Taking the time to set up your preferences will ensure that your ads blend well with your website and provide a seamless experience for your visitors.
4. Familiarize Yourself with Ad Units
Google AdSense offers several types of ad units you can use to monetize your blog. Here are the most common ones:
- Display Ads: These are visually appealing ads that can be placed in different areas of your website (such as sidebars, header sections, or within posts).
- Text Ads: These ads feature text links and are simple and minimalistic.
- Link Units: These show clickable links related to your content or audience interests.
- In-Article Ads: These are ads embedded within your blog content, making them less intrusive for readers.
Understanding these ad units will help you decide how to integrate them effectively with your Kadence Theme.
5. Explore the AdSense Help Center
If you’re ever stuck during this process, Google has an excellent AdSense Help Center with comprehensive guides and tips for beginners. You can find information about everything from how to optimize ad performance to how to troubleshoot problems. It’s a fantastic resource if you ever need extra assistance.
Final Thoughts
Setting up your Google AdSense account is an important milestone because it sets the foundation for monetizing your blog. Take the time to ensure you’ve completed all the steps properly, from entering payment and tax information to fine-tuning your ad preferences.
Once your account is fully set up, you’ll be ready to move on to integrating Google AdSense with your Kadence Theme. This will allow you to place ads on your blog and start earning revenue as your readers engage with your content.
With everything now in place, let’s proceed to the next step and connect your AdSense account to your Kadence Theme—making it easier than ever to start earning income from your blog.
Step 3: Install and Configure Kadence Theme
Now that you’ve signed up for Google AdSense and set up your AdSense account, the next step is to install and configure the Kadence Theme on your WordPress website. The Kadence Theme is an excellent choice for beginners because it’s easy to use, customizable, and works seamlessly with Google AdSense. Let’s walk through how to get your Kadence Theme ready so you can connect your ads and monetize your blog.
1. Install the Kadence Theme
The first step is to get the Kadence Theme installed on your WordPress website. Here’s how you can do it:
- Log in to Your WordPress Dashboard: Head to your WordPress admin area by visiting yourwebsite.com/wp-admin/.
- Go to Appearance > Themes: In the left-hand menu, click on Appearance and then Themes.
- Add New Theme: Click on the Add New button at the top of the page.
- Search for Kadence: In the search bar, type Kadence Theme.
- Install and Activate: When the Kadence Theme appears in the search results, click Install, then click Activate once the installation is complete.
And there you have it! The Kadence Theme is now installed and ready to use.
2. Explore Kadence Theme Options
Once the theme is activated, take some time to familiarize yourself with the Kadence Theme Options and configure your site to reflect your preferences. Here’s how you can access it:
- From the WordPress Dashboard, navigate to Appearance > Customize.
- This will open the Kadence Theme Customizer, where you can adjust various elements of your website’s appearance.
Kadence Theme offers a variety of options, including:
- Site Identity: Set your logo, tagline, Qand site title.
- Colors & Typography: Choose colors and fonts that match your brand or style.
- Header & Navigation: Customize your header layout and navigation menu style.
- Footer Options: Set up a personalized footer that aligns with your blog’s design.
Kadence is beginner-friendly, so you don’t need to know how to code to make these adjustments. The live preview feature allows you to see changes in real-time as you make edits.
3. Enable Responsive Design
One of Kadence’s most significant benefits is its responsiveness, meaning it looks great on all devices, from desktops to smartphones. However, it’s important to double-check that this feature is enabled:
- Go to Appearance > Customize.
- Look for Responsive Options or similar settings under the Design Settings.
- Ensure that mobile responsiveness is enabled so your readers have a smooth experience, no matter which device they use to visit your blog.
This will ensure that any ads you place (via Google AdSense) look great and function properly on every screen size.
4. Set Up the Site Layout with Kadence Blocks
Kadence also integrates seamlessly with Kadence Blocks, a plugin that enhances WordPress editing by adding block options, design elements, and flexibility to your pages and posts. To get started:
- Go to Plugins > Add New from your WordPress Dashboard.
- Search for Kadence Blocks and click Install > Activate.
- Once activated, you’ll have access to advanced layout options, such as creating custom landing pages, organizing ads within content, or building attractive blog designs.
Kadence Blocks make it easier to create custom pages and ensure that your ads blend into the content seamlessly.
5. Customize Your Blog’s Appearance
Now that Kadence is installed and configured, you can focus on customizing your blog to create a professional and attractive look. Here are a few essential areas to tweak:
- Upload a Logo: Go to Appearance > Customize > Site Identity to upload your logo.
- Choose Your Color Scheme: Under Appearance > Customize > Colors & Typography, select colors that reflect your brand.
- Adjust Fonts: Choose easy-to-read fonts that fit your blog’s style.
A clean, professional design ensures that your blog looks visually appealing and is easy to navigate—key factors for attracting and retaining readers.
Final Thoughts
Installing and configuring the Kadence Theme is a simple but essential step in preparing your blog for monetization with Google AdSense. With its user-friendly customization options and mobile-responsive design, Kadence makes it easy for beginners to set up a professional, functional blog without needing coding skills.
Once you’ve completed this step, you’ll be ready to integrate your AdSense ads into your Kadence website and move on to the next phase of monetization. Take your time with customization to ensure your blog looks great and functions smoothly.
Next up, we’ll explore how to integrate your Google AdSense ads into your Kadence Theme seamlessly.
Step 4: Connect Google AdSense to Your Kadence Theme
Now that you’ve installed and set up the Kadence Theme, it’s time to connect your Google AdSense account to your website so you can start displaying ads. Integrating AdSense with your Kadence Theme is easier than you might think—no technical skills required! Let’s go through the steps to connect everything and get your ads up and running.
1. Access Your Google AdSense Dashboard
Before connecting ads to your Kadence Theme, log into your Google AdSense Dashboard using your Google credentials at https://www.google.com/adsense/. This is where you’ll manage your ads, view your earnings, and generate the ad code you’ll add to your website.
Once you’re in the dashboard, locate the Ad Units option. This is where you can create different ad types (display ads, text ads, or link units) and get the embed codes necessary for your blog.
2. Create Ad Units in Your AdSense Dashboard
Before placing ads on your Kadence site, you’ll need to generate ad units through Google AdSense:
- Go to your AdSense Dashboard and navigate to Ads > Ad Units.
- Click on Create New Ad Unit to design your first ad unit.
- Choose the ad type you’d like to use: Display Ads, Text Ads, or In-Article Ads.
- Customize the ad’s appearance, such as size, colors, and responsiveness.
- After customizing the ad, click Save and Get Code.
Once you click Save and Get Code, Google will generate a snippet of HTML/JavaScript code that you’ll need to add to your Kadence website.
3. Embed the AdSense Code into Your Kadence Website
Now that you have your AdSense code, the next step is to place it on your website using the Kadence Theme. Here’s how:
- Log in to WordPress Dashboard: Head to your WordPress admin panel at yourwebsite.com/wp-admin.
- Navigate to Widgets: Go to Appearance > Widgets from the sidebar menu.
- Select the Right Widget Area: Kadence has designated widget areas like Sidebar, Footer, or Header that are ideal for ads. Choose the area where you’d like your ads to appear.
- Add a Custom HTML Widget: Click Add Block (or Add Widget depending on your WordPress view), and search for the Custom HTML block.
- Paste Your AdSense Code: Copy and paste the Google AdSense ad code (HTML/JavaScript) into the Custom HTML widget.
- Save Changes: After pasting your code, click Save or Update to apply the changes.
This will embed your ads in the chosen location on your Kadence blog.
4. Test Your Ads
Once your ad codes are added, visit your website to ensure the ads are loading properly. You might need to wait a few minutes for the ads to appear, especially if this is the first time you’ve added them. Refresh your site a few times to confirm that the ads show up as expected.
5. Optimize Ad Placement with Kadence Customizer
Kadence makes it simple to optimize ad placement through its customizer settings. Here’s how:
- Navigate to Appearance > Customize in your WordPress Dashboard.
- Look for Header Options or Footer Options, depending on where you want your ads to show.
- Use the Ad Customizer Settings to adjust the layout and positioning, ensuring ads are user-friendly and not intrusive to your visitors.
With these customization options, you can ensure that your ads blend well with your website’s design and provide a seamless user experience.
Final Thoughts
Connecting Google AdSense to your Kadence Theme is an exciting step! Now that you’ve embedded your ad code into your site, you’re ready to start earning revenue from ads. While the integration itself is simple, it’s essential to monitor ad performance and make adjustments as needed to optimize your income.
The next step will involve testing, optimizing, and learning how to track your earnings effectively with AdSense. Stay tuned as we move forward on this journey toward monetization success!
Step 5: Optimize Your Website for AdSense Success
Now that you’ve connected Google AdSense to your Kadence Theme and embedded your ad codes, the next step is to optimize your website to ensure the ads perform well and your readers have a seamless browsing experience. AdSense optimization involves making adjustments to your site’s layout, user experience, and design to increase your earnings potential while keeping your audience happy. Let’s break this down step-by-step.
1. Choose Strategic Ad Placements
Where you place your ads on your website can make a huge difference. The goal is to ensure that ads are visible enough to generate clicks but not intrusive to the user experience. Here are the most effective areas to place ads:
- Above the Fold: Place ads near the top of your homepage or posts so users see them without scrolling.
- Within Blog Posts: In-article ads perform well because they are embedded naturally within the content.
- Sidebar Widgets: Many Kadence themes include sidebar spaces perfect for AdSense placement.
- Footer Area: While less prominent, ads in the footer can still generate clicks, especially for readers who scroll to the bottom of the page.
Use the Kadence Customizer to adjust and preview these placements, ensuring the ads integrate well with your theme without overwhelming the user interface.
2. Use Responsive Ads for Mobile Users
Today, a significant portion of website traffic comes from mobile devices. Kadence Theme is responsive, meaning it works well on mobile devices, but you should confirm that Google AdSense’s responsive ad options are enabled.
Responsive ads automatically adjust their size and format depending on the user’s screen size, ensuring they are visible and functional on both mobile and desktop devices. Here’s how to ensure they’re enabled:
- Go to Google AdSense Dashboard and edit your ad unit settings.
- Select the Responsive Ad Size option under the ad configuration settings.
- Save the changes and revisit your website to check that ads are displaying well across all devices.
This small change can significantly improve user experience while maximizing your ad revenue.
3. Ensure Fast Page Load Times
One of the most common reasons users leave websites is slow page load speeds. Fast-loading websites offer a better user experience and are favored by Google’s algorithms. Ads can sometimes slow your site, so optimizing your site’s speed is vital for AdSense success.
Here are some ways to improve your website’s speed:
- Optimize Images: Use tools like TinyPNG or plugins like WP Smush to compress image sizes without losing quality.
- Enable Caching: Use a caching plugin like W3 Total Cache or WP Super Cache to speed up your site.
- Minimize Unused Plugins: Too many plugins can slow down your website. Disable or remove unnecessary ones.
- Use a Content Delivery Network (CDN): A CDN can help load content faster by serving it from servers closer to the user’s location.
Kadence Themes are known for their clean coding, but combining it with these optimization tips can make your website even faster.
4. Create High-Quality Content Consistently
While optimizing ad placements and site speed are essential, content is the backbone of a successful AdSense strategy. Google rewards websites with high-quality, original, and engaging content by displaying more relevant ads and improving your site’s ranking.
To boost your AdSense earnings, focus on:
- Writing blog posts that solve user problems.
- Publishing content that aligns with your target audience’s interests.
- Using keyword research tools to find topics that your readers are actively searching for.
Engaging and valuable content keeps your audience coming back for more, increasing your ad impressions and click-through rates.
5. Monitor Your Performance Regularly
Google AdSense offers a detailed reporting dashboard where you can monitor your earnings, impressions, and click-through rates (CTR). Use this data to identify trends and optimize your site further.
Here’s how you can analyze performance:
- Track which ad placements and formats are generating the most clicks.
- Observe which content performs better with ads.
- Experiment with A/B testing to identify what works best.
Regular analysis will help you adapt your strategy and improve ad performance over time.
Final Thoughts
Optimizing your website for AdSense success isn’t just about adding ads. It’s about creating a seamless, user-friendly website that loads quickly, offers value to your readers, and ensures ads are placed strategically. By focusing on smart ad placements, site performance, mobile responsiveness, and creating consistent, high-quality content, you’ll set yourself up for long-term success with Google AdSense.
Keep monitoring your progress and fine-tune your strategies as needed. With continued effort, you’ll see your AdSense earnings grow while maintaining a great experience for your readers.
Step 6: Customize Your AdSense Ad Appearance
Now that you’ve connected Google AdSense to your Kadence Theme and optimized your website, the next step is to customize the appearance of your ads. While Google automatically creates ads, you can tweak how they look on your site to ensure they blend in with your blog’s design. Customized ads not only make your site visually appealing but also improve user experience and click-through rates. Let’s walk through how to make these adjustments step-by-step.
1. Log in to Your Google AdSense Dashboard
The first step is accessing your Google AdSense Dashboard. This is where you’ll manage your ad units and make necessary adjustments to their design and behavior. Log in to your account at https://www.google.com/adsense/ using your credentials.
2. Choose the Right Ad Format
Google AdSense offers several ad formats, each with unique styles. Picking the right format can improve the user experience and your site’s overall aesthetic. Here are the most popular ad formats:
- Display Ads: These are graphical ads that often include images or animations and are visually appealing.
- Text Ads: These are simple text-based ads that focus on keywords and are less intrusive.
- In-Article Ads: These ads are embedded into blog posts and blend well with the written content.
- Link Units: They show groups of related topics or categories, allowing users to navigate to relevant content.
Kadence allows you to place these ad types in strategic locations on your site. Use the AdSense Dashboard to select the ad formats that align with your website’s layout and design.
3. Match Your Blog’s Style with Ad Colors
Customizing the colors of your ads ensures they don’t disrupt the look and feel of your website. Google AdSense allows you to edit the color scheme of ads to match your Kadence Theme’s design.
Here’s how to adjust this:
- Go to your Google AdSense Dashboard.
- Navigate to Ads > Ad Units.
- Select the ad unit you want to edit.
- Look for Ad Style Options and pick colors that align with your site’s theme.
- Choose colors for the background, borders, and text that harmonize with your blog design.
For example, if your website uses a soft pastel color scheme, adjust the ad colors to complement this style. The goal is to make ads feel like a natural part of your site rather than looking intrusive.
4. Optimize for Visibility without Being Intrusive
Although the goal is to make ads visible to generate clicks, they shouldn’t overwhelm your readers or interrupt the user experience. Use a balance between visibility and discretion. Avoid placing too many ads in one location or using overly bright colors that clash with your website’s design.
Here are a few tips:
- Keep Ads Above the Fold: Users should see ads without having to scroll too much.
- Don’t Overcrowd Your Layout: Too many ads can make your site feel cluttered and turn readers away.
- Prioritize User Experience: Remember, your audience’s experience matters. Ads that disrupt reading can lead to high bounce rates.
Kadence Theme makes it easy to configure optimal ad positions using widgets and customizer options, so use these features to create a smooth browsing experience.
5. Test Ad Placement and Styles
Once you’ve adjusted the appearance of your ads and chosen strategic locations, it’s time to test their performance. Testing will show you how ads interact with your site visitors and whether any changes are improving user engagement or earnings.
Here’s how you can do this:
- Monitor CTR (Click-Through Rate) via the Google AdSense Dashboard to see which ad styles perform the best.
- Experiment with different ad placements (sidebar, header, in-content) to find the most engaging ones.
- Adjust ad colors, sizes, or formats as needed and observe changes in performance over time.
Testing ensures that you’re not just relying on guesswork but making data-driven decisions to maximize earnings.
6. Use Kadence Customizer to Refine Ad Layouts
Kadence offers advanced options to integrate ads without affecting the user experience. You can use the Customizer (under Appearance > Customize) to adjust ad visibility and placement settings. Experiment with the layout options to ensure ads fit seamlessly into your blog’s design and don’t disrupt navigation or readability.
Kadence’s drag-and-drop features also make it easy to place ads in areas like the header, footer, sidebar, or between blog posts. These tools are beginner-friendly and don’t require technical knowledge or coding.
Final Thoughts
Customizing your Google AdSense ad appearance allows you to maintain a professional, user-friendly website while maximizing ad performance. With the ability to adjust ad formats, colors, and placement strategically, you’ll create a design that enhances both aesthetics and functionality.
By investing time in customization, you’ll ensure that ads feel like part of the website rather than an interruption. As you continue to monitor performance, make tweaks as needed to stay on top of trends and user behavior.
With a little patience and experimentation, you’ll optimize your ads to blend seamlessly with your Kadence-powered blog and boost your monetization efforts.
Step 7: Monitor Your AdSense Performance Regularly
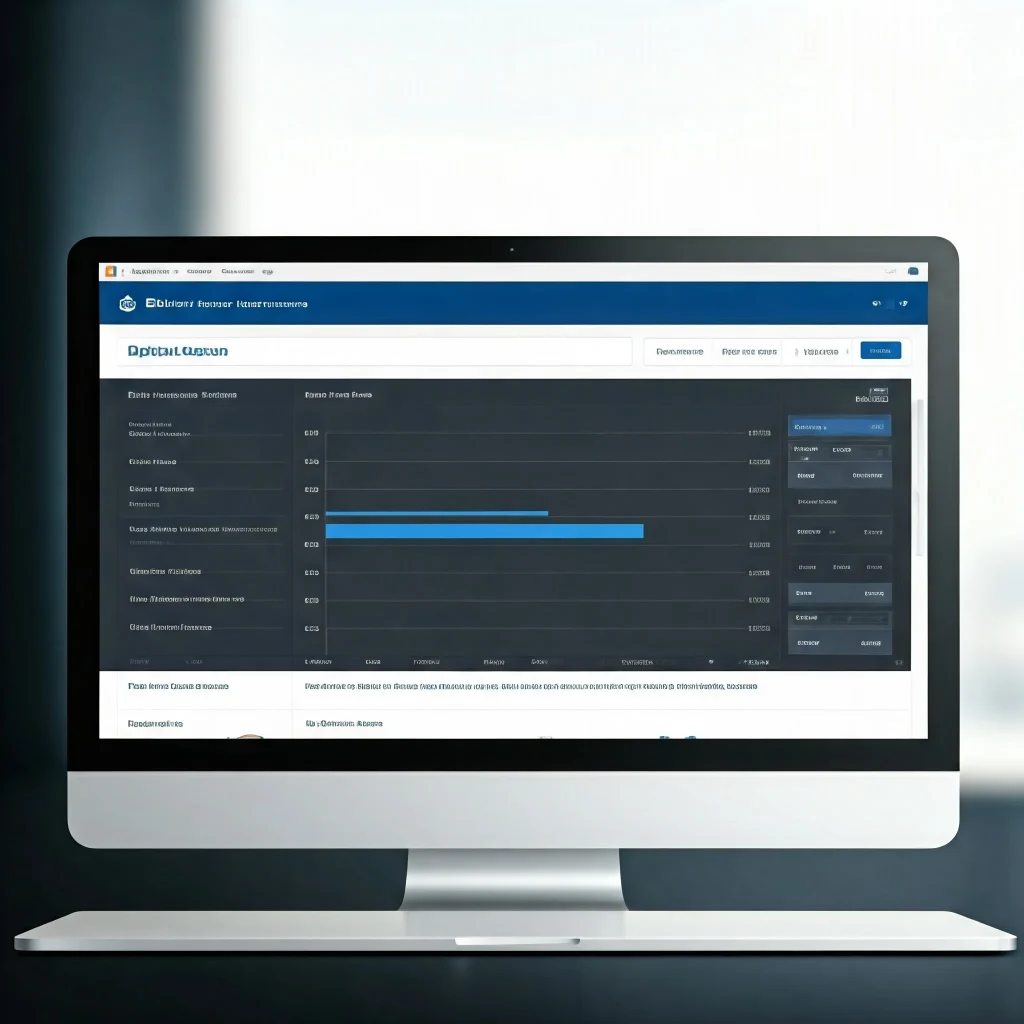
Now that you’ve set up Google AdSense on your Kadence-powered website and optimized your ad placements and design, the next important step is monitoring your performance. Regularly tracking your AdSense metrics will give you insights into how well your ads are performing, which strategies are working, and where you can make adjustments. Monitoring your performance is vital for ensuring your efforts translate into real earnings over time. Let’s explore how to effectively track and analyze your AdSense data.
1. Access Your AdSense Dashboard
The first step is to check your Google AdSense Dashboard. This is the hub where you’ll find all the essential data about your ad performance, earnings, impressions, click-through rates (CTR), and more.
- Log into your Google AdSense account at https://www.google.com/adsense/.
- Navigate to the Reports or Performance Reports section.
The AdSense Dashboard provides an overview of important metrics, such as earnings, impressions, and CTR, so you can see how well your ads are performing.
2. Understand the Key Metrics to Monitor
To analyze your ad performance effectively, focus on the following key metrics:
- Earnings: This is the amount of money you’ve earned from your ads. Look for patterns over time to identify trends in your income.
- Click-Through Rate (CTR): This measures how often users click on your ads. A higher CTR typically means that your ads are well-targeted and well-placed.
- Page Impressions: The number of times your ads were displayed to users. Increasing page views can lead to more opportunities for ad impressions.
- RPM (Revenue Per Thousand Impressions): RPM shows how much money you earn for every 1,000 ad impressions. It’s an essential metric for understanding the value of your traffic.
- Ad Engagement: Analyze how users interact with different ad placements or ad types. Some ad formats may perform better than others depending on your audience.
Understanding these metrics allows you to identify which areas are performing well and which need adjustment.
3. Analyze Trends Over Time
AdSense data isn’t just a snapshot of the moment—it’s about trends over time. Look at the data weekly, monthly, or quarterly to understand patterns.
- Identify Seasonal Patterns: Are certain months performing better than others? Maybe holidays or seasonal trends affect your ad performance.
- Assess Content Performance: Check which blog posts or pages are generating the most revenue. This can provide insights into the kind of content your audience engages with.
- Evaluate Ad Placements: Analyze CTR and earnings based on different ad placements. Some spots (like above the fold or in-content ads) may perform better than others.
You can use this information to make informed decisions about adjusting your strategy.
4. Experiment with A/B Testing
A/B testing involves testing two or more variations to see which performs better. This is an effective way to identify what works best for your audience. Here’s how you can conduct A/B testing:
- Ad Placement: Test ads in different areas, such as the header, sidebar, or in content.
- Ad Formats: Experiment with different ad formats (text vs. display, in-content ads vs. link units) to see what resonates with your audience.
- Ad Styles: Change colors, sizes, or responsiveness settings to determine which combination leads to better CTR and engagement.
With A/B testing, you’ll gather data-driven insights instead of relying solely on guesswork.
5. Make Data-Driven Adjustments
Once you’ve analyzed your performance data, it’s time to make changes based on insights. Use your findings to:
- Optimize Ad Placements: Move ads to areas that generate better engagement.
- Refine Ad Styles: Adjust colors, sizes, and design to align better with your audience’s preferences.
- Focus on High-Performing Content: If certain types of blog posts generate higher earnings, prioritize creating similar content.
- Improve Website Speed: Slow page speeds can negatively impact both user experience and ad performance.
Regular adjustments will keep your website competitive and your AdSense revenue growing.
6. Leverage Insights for Long-Term Growth
Monitoring performance isn’t just about short-term tweaks. Over time, you can use insights from Google AdSense to identify opportunities for long-term growth.
- Focus on creating content that aligns with the interests of your audience.
- Look for opportunities to increase organic traffic through SEO strategies.
- Experiment with promotional strategies to grow your audience.
By continuously analyzing your AdSense performance and implementing adjustments, you’ll build a sustainable income strategy.
Final Thoughts
Monitoring your AdSense performance is not a one-time task. Regularly checking metrics like CTR, impressions, RPM, and ad engagement will give you the insights needed to adjust your strategy and improve your earnings. A data-driven approach allows you to identify what works and what doesn’t, helping you optimize your ad strategy over time.[Kadence Theme Google AdSense Setup][Kadence Theme Google AdSense Setup][Kadence Theme Google AdSense Setup]
With consistent monitoring, testing, and adjustment, you’ll ensure that your efforts with Kadence and Google AdSense lead to long-term success.
Step 8: Leverage SEO to Boost AdSense Earnings
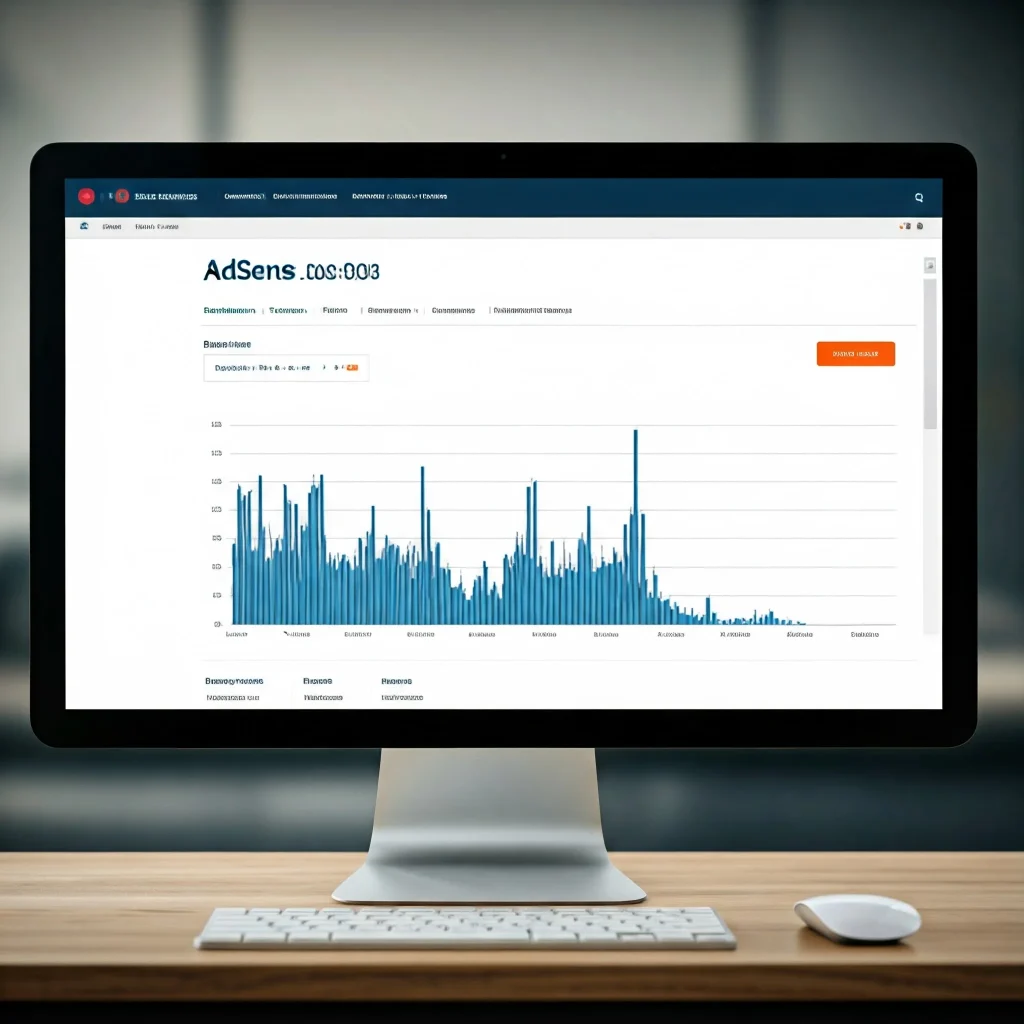
Now that your Google AdSense is set up and optimized, the next step is to focus on Search Engine Optimization (SEO). SEO is the key to driving organic traffic to your blog, which directly affects your AdSense earnings. The more visitors you have, the more opportunities your ads have to be seen and clicked. Implementing effective SEO strategies will ensure that your Kadence-powered website ranks higher on search engines like Google, attracting more readers and increasing your chances of monetization success. Let’s dive into how you can optimize your website for search engines.
1. Focus on Keyword Research
Keywords are the foundation of any successful SEO strategy. They help search engines understand what your content is about and connect it with users’ search queries. To get started with keyword research:
- Identify Your Niche: Understand what your blog focuses on (e.g., fitness, travel, tech) and the topics your audience is interested in.
- Use Keyword Tools: Tools like Google Keyword Planner, SEMrush, or Ahrefs can help you find high-traffic, low-competition keywords.
- Focus on Long-Tail Keywords: These are specific phrases (e.g., “best running shoes for beginners” instead of just “running shoes”) that are easier to rank for.
- Analyze Competitors: Look at your competitors’ websites to see which keywords they are targeting successfully.
By focusing on the right keywords, you can craft content that aligns with your audience’s search intent and drives traffic to your website.
2. Optimize On-Page SEO Elements
Once you have your keywords ready, it’s time to optimize your website’s individual pages and posts for SEO. Here are the key on-page SEO elements to focus on:
- Title Tags: Ensure your page or post titles include target keywords and are engaging enough to encourage clicks.
- Meta Descriptions: Write concise, informative meta descriptions with your primary keywords. These show up in search engine results.
- Header Tags (H1, H2, H3): Organize content using proper heading tags and include keywords in these headings.
- URL Structure: Create short, clean URLs that include your target keywords. For example, yourwebsite.com/seo-tips-for-beginners instead of yourwebsite.com/?p=123.
- Alt Text for Images: Use descriptive alt text for images, including keywords when relevant. Search engines use this to index image content.
Kadence Theme makes it easy to manage these on-page SEO elements by allowing you to edit page titles, meta descriptions, and optimize content layouts with ease.
3. Create High-Quality, Valuable Content
Search engines prioritize websites that provide value to readers. When creating blog posts, focus on:
- Writing in-depth, engaging articles that answer your audience’s questions.
- Incorporating relevant keywords naturally throughout your content without “keyword stuffing.”
- Including internal links to other related content on your site to keep users engaged.
Content should be easy to read, with headings, bullet points, and concise paragraphs. Users are more likely to stay on your site when content is well-structured and addresses their needs.
4. Improve Your Website’s Technical SEO
Technical SEO ensures that search engines can easily crawl and index your website. Some essential technical SEO factors include:
- Website Speed: A slow-loading website can lead to a poor user experience and lower search rankings. Optimize image sizes, enable caching, and use a reliable hosting provider.
- Mobile Optimization: With the majority of users accessing websites via mobile devices, ensure your site looks great and functions properly on smartphones and tablets.
- Secure Your Website with HTTPS: Google prioritizes secure websites, so make sure your website uses SSL encryption. Kadence Theme is compatible with HTTPS and makes this easy to implement.
- Fix Broken Links: Broken links lead to a poor user experience and negatively impact SEO rankings. Use plugins like Broken Link Checker to identify and fix them.
Ensuring your site is technically optimized will improve user experience and make it easier for search engines to index your content.
5. Build Backlinks to Your Website
Backlinks are links from other websites to your site. They act as a vote of confidence from other sites, signaling to search engines that your content is trustworthy and valuable. Here’s how to build high-quality backlinks:
- Guest Posting: Write guest posts for other reputable blogs in your niche and link back to your website.
- Collaborate with Influencers: Partner with other bloggers or influencers to share your content.
- Create Shareable Content: Infographics, research studies, or how-to guides are more likely to be shared and linked by others.
Backlinks boost your website’s authority and can lead to higher rankings on search engines.
Final Thoughts
Effective SEO is a long-term strategy, but it’s worth the effort if you want to increase traffic and AdSense earnings. By focusing on keyword research, on-page SEO optimization, technical improvements, and building backlinks, you’ll boost your chances of ranking higher in search results and attracting more readers.[Kadence Theme Google AdSense Setup][Kadence Theme Google AdSense Setup][Kadence Theme Google AdSense Setup]
With Kadence Theme’s user-friendly design and SEO-friendly features, implementing these strategies becomes much easier—even for beginners.[Kadence Theme Google AdSense Setup][Kadence Theme Google AdSense Setup][Kadence Theme Google AdSense Setup]
By optimizing your site for search engines and consistently creating valuable content, you’ll ensure that your AdSense ads get more impressions and clicks, helping you grow your income over time.
Step 9: Optimize Your Website for Better User Experience
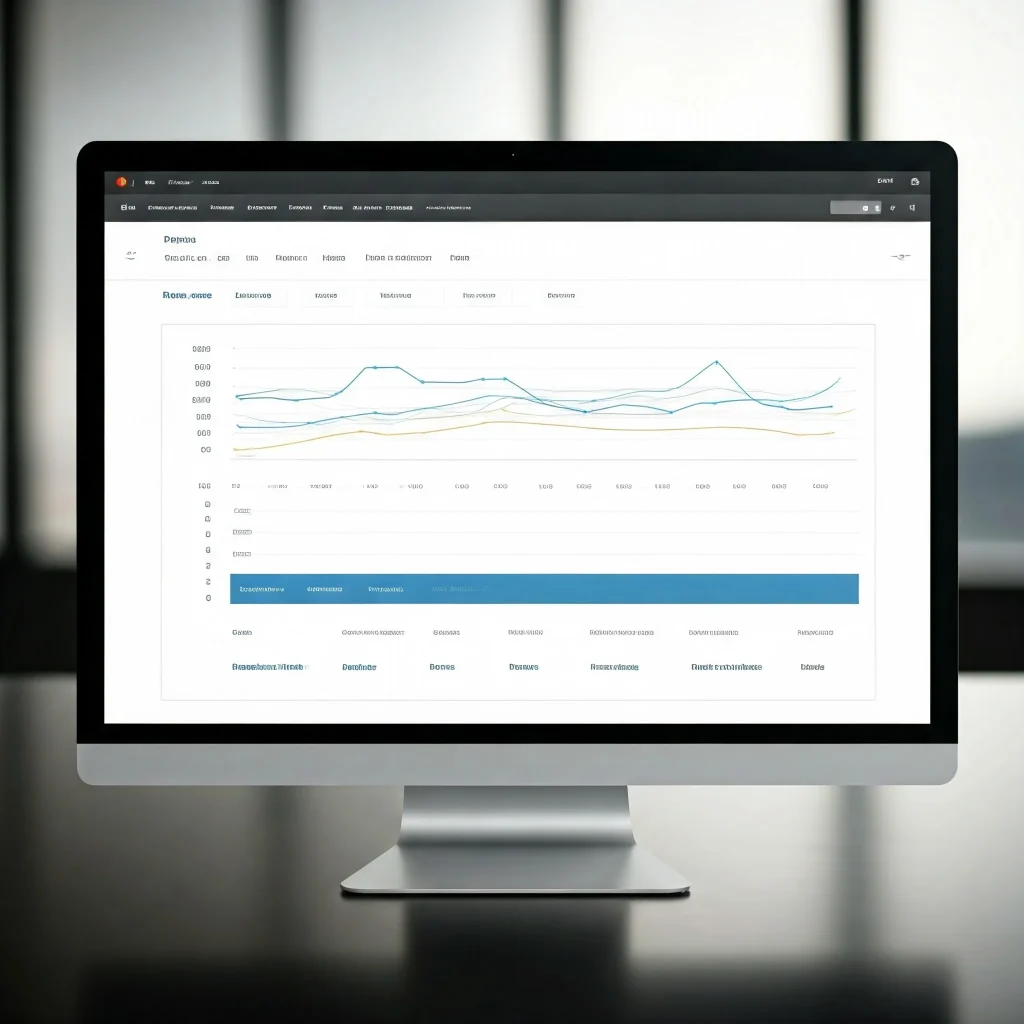
By now, you’ve set up Google AdSense, customized your ads, implemented SEO strategies, and monitored your performance regularly. The next important step is to optimize your website for an exceptional user experience (UX). A well-optimized website ensures that visitors have a smooth, intuitive, and enjoyable browsing experience. This directly impacts how long users stay on your site, how many pages they visit, and how likely they are to click on ads. Let’s go over how you can improve user experience to complement your AdSense strategy.
1. Focus on Website Speed
Website speed is one of the most important aspects of user experience. A slow-loading site can frustrate visitors and lead to higher bounce rates, which negatively impacts both user engagement and SEO rankings.
Here’s how to speed up your Kadence-powered WordPress site:
- Optimize Images: Large, uncompressed images slow down website speed. Use tools like TinyPNG or image optimization plugins like Smush to reduce file sizes without sacrificing quality.
- Enable Caching: Use caching plugins like WP Super Cache or W3 Total Cache to store static versions of your site and serve them faster to returning visitors.
- Minimize HTTP Requests: Remove unnecessary elements and combine CSS and JavaScript files when possible.
- Use a Fast Hosting Provider: Your website hosting can dramatically affect load times. Choose a reliable, high-speed hosting service.
By ensuring your website loads quickly, you’ll improve the user experience and encourage readers to stay on your site longer.
2. Make Your Website Mobile-Friendly
More than half of web traffic now comes from mobile devices. This means your website must function seamlessly on smartphones and tablets. Kadence Theme is already optimized for mobile responsiveness, but you can do a few extra things:
- Test Mobile Performance: Use tools like Google’s Mobile-Friendly Test to check how well your site performs on mobile devices.
- Ensure Readable Text: Text should be easy to read on small screens without zooming. Adjust font sizes and line spacing if necessary.
- Enable Mobile-Friendly Menus: Simplify navigation for mobile users by implementing responsive menus that are easy to access.
A mobile-friendly website will keep your visitors happy and improve your chances of generating AdSense clicks.
3. Improve Website Navigation
A clean, intuitive navigation structure helps users find content quickly and keeps them exploring your site. To improve navigation:
- Organize Your Content: Group related blog posts into categories and tags. This makes it easier for readers to find what they’re looking for.
- Create a Clear Menu: Use Kadence’s customizable menu options to create a user-friendly, organized navigation menu. Include important pages like “About,” “Contact,” “Blog Categories,” and a search bar.
- Include Internal Links: Link to relevant blog posts or pages within your content to encourage users to keep reading.
When visitors can easily find what they’re looking for, they’re more likely to engage with your content and click on your ads.
4. Streamline the Design and Visual Appeal
Your website design impacts how users perceive and interact with your content. A clean, modern, and visually appealing design makes readers feel more confident navigating your website. Kadence Theme offers customizable design options to help with this. Consider:
- Using White Space: Avoid clutter by leaving enough space between text, images, and ads. White space creates a clean, readable look.
- Choosing a Consistent Color Scheme: Stick to a cohesive color palette that aligns with your brand and is easy on the eyes.
- Prioritizing Readability: Ensure font choices, sizes, and contrasts allow users to read content comfortably.
A well-designed, visually appealing website improves engagement and can lead to higher AdSense performance.
5. Enhance User Engagement with Interactive Features
Adding interactive elements to your blog can boost user engagement and time spent on your website. Some examples include:
- Related Posts Widgets: Use plugins or Kadence’s customization features to show related posts to readers at the end of each blog post.
- Engaging Calls-to-Action (CTAs): Encourage users to subscribe to newsletters, comment, or explore related content with clear, compelling CTAs.
- Use Polls and Quizzes: Interactive features like polls or quizzes can make the user experience more engaging, leading visitors to spend more time on your site.
Engagement increases the likelihood that users will click on your ads, helping you earn more revenue from AdSense.
6. Minimize Pop-ups and Intrusive Elements
While ads are important, intrusive elements like pop-ups or overused banners can irritate visitors. This can lead to higher bounce rates and lower user satisfaction. Keep your website’s user experience in mind by:
- Avoiding aggressive pop-ups that block content.
- Ensuring ads are placed naturally and don’t disrupt a user’s ability to navigate or read.
- Keeping design minimalistic and intuitive to allow content and ads to coexist without causing distraction.
A user-friendly design improves both user satisfaction and ad performance.
Final Thoughts
Optimizing your website for a better user experience is essential for long-term success with Google AdSense. Faster load times, mobile optimization, easy navigation, intuitive design, and interactive elements all contribute to a seamless browsing experience. A happy user is more likely to explore your site, engage with your content, and click on ads.[Kadence Theme Google AdSense Setup][Kadence Theme Google AdSense Setup][Kadence Theme Google AdSense Setup]
With Kadence Theme’s customization capabilities and these tips, you can create a user-friendly, visually appealing website that not only looks great but also performs well.[Kadence Theme Google AdSense Setup][Kadence Theme Google AdSense Setup][Kadence Theme Google AdSense Setup]
By prioritizing user experience, you’re setting up your website to build trust, retain readers, and maximize your AdSense revenue.
Step 10: Keep Learning and Adapting Your Strategy
Congratulations! You’ve successfully set up Google AdSense on your Kadence-powered website, optimized ad placements, implemented SEO strategies, monitored your performance, and ensured your site is user-friendly. Now that everything is in place, the final and most important step is to keep learning and adapting.
The digital landscape is always changing, and what works today may not work tomorrow. By staying informed, testing new strategies, and continuously improving, you’ll ensure your AdSense strategy remains effective and profitable in the long run.
1. Stay Updated with Google AdSense Changes
Google frequently updates its AdSense policies, features, and best practices. Staying informed about these changes will allow you to maintain compliance, explore new opportunities, and adapt your strategies to meet new opportunities.
- Subscribe to the AdSense Blog: Google shares valuable insights and updates on its AdSense Blog.
- Join the AdSense Help Community: Engage with other publishers, learn from their experiences, and stay informed about common challenges and solutions.
- Read Google’s Updates Regularly: These updates include changes to algorithms, ad formats, and monetization policies.
By keeping up with changes, you’ll ensure you’re not caught off guard by policy shifts or technological advancements.
2. Test New Strategies and Experiment
Once your initial strategy is in place, don’t become stagnant. Testing new strategies is an essential part of long-term success with Google AdSense. You can experiment with:
- Different Ad Placements: Move ads to new spots on your website to see if user engagement increases.
- Ad Styles and Sizes: Change the color scheme, style, or dimensions of your ads to match your site design better.
- Content Focus: Analyze your top-performing content and try writing similar blog posts to capture the attention of your audience.
- A/B Testing: Use A/B testing tools to experiment with multiple variations of ad layouts, headlines, and formats.
Even small changes can lead to better results, so don’t hesitate to try new approaches.
3. Continue Monitoring Your AdSense Performance
The monitoring process doesn’t stop after the initial setup. Consistently review your AdSense metrics through the AdSense Dashboard and note any changes in user behavior or ad performance trends. Keep an eye on:
- CTR (Click-Through Rate): Look for ways to improve CTR by optimizing ad placements and content strategy.
- Revenue Trends: Compare earnings from month to month to identify patterns and adjust your approach if needed.
- Impressions and RPM: Review ad impressions and RPM to assess the effectiveness of your ad strategy.
Regular analysis will keep you proactive, allowing you to adjust strategies as trends emerge.
4. Learn from Your Audience
One of the best ways to improve your website’s AdSense performance is by understanding your audience. Dive into your website analytics (Google Analytics is a great tool for this) to learn about your audience demographics, interests, and behaviors.
- Which blog posts or content types perform the best?
- What devices are your visitors using?
- Which traffic sources are driving the most engagement?
Using this data, you can tailor your content to meet your audience’s needs better, which will drive traffic and increase the opportunities for ad impressions and clicks.
5. Expand Your Knowledge through Online Resources
The world of blogging, SEO, and AdSense can be overwhelming at first, but continuous learning will set you apart. Explore resources like:
- Google’s Official AdSense Guide: Google provides plenty of guides on optimizing AdSense strategies.
- Online Courses: Platforms like Udemy, Skillshare, or Coursera offer courses on SEO, blogging strategies, and monetization.
- YouTube Tutorials: Many creators share practical insights into optimizing blogs for AdSense success.
The more you learn, the better equipped you’ll be to adapt your strategies and maintain consistent growth.
6. Stay Consistent and Patient
AdSense success isn’t about instant results. Monetization takes time, patience, and consistency. Keep producing high-quality content, implementing the strategies you’ve learned, and improving your site’s performance step by step.
- Focus on building a loyal audience.
- Stay consistent with content publishing.
- Trust the process and adjust when necessary.
As long as you remain committed to improving and learning, your efforts will eventually pay off.
Final Thoughts
The final step in your AdSense journey is understanding that growth is a continuous process. Google AdSense and blogging success depend on experimentation, analysis, and adaptation. As trends shift, stay agile by learning, testing, and improving your strategies over time.[Kadence Theme Google AdSense Setup][Kadence Theme Google AdSense Setup][Kadence Theme Google AdSense Setup]
With Kadence Theme’s user-friendly features, Google AdSense’s robust monetization options, and your dedication, you’re now equipped to build a sustainable income through blogging.[Kadence Theme Google AdSense Setup][Kadence Theme Google AdSense Setup][Kadence Theme Google AdSense Setup]
Stay proactive, stay curious, and keep growing. Your journey with Google AdSense is just beginning, and the possibilities are endless.
NEXT TOPIC : Optimizing Core Web Vitals with Kadence Theme

