
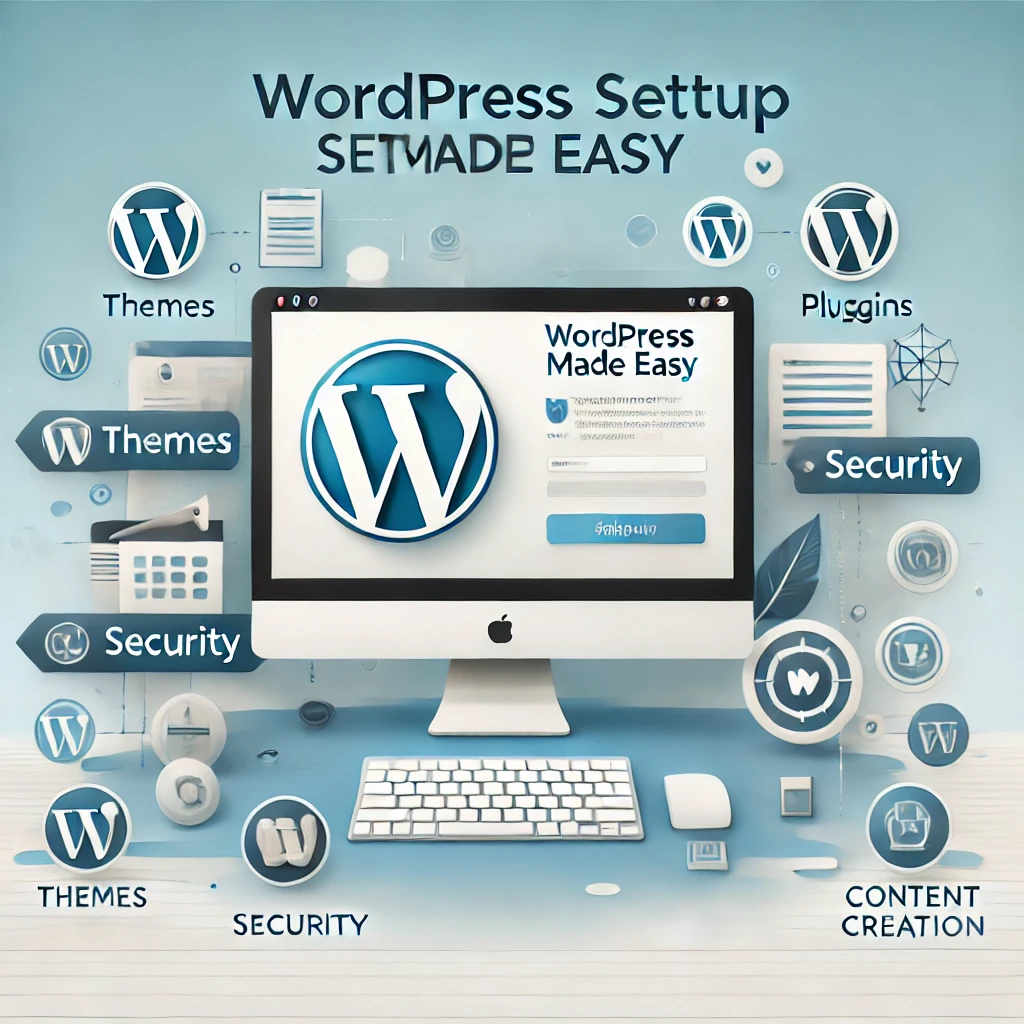
Introduction

Starting your own website might seem overwhelming, but don’t worry—WordPress makes it easier than you think! Whether you’re launching a personal blog, an online store, or a business website, WordPress is one of the most beginner-friendly and powerful platforms out there. The best part? You don’t need to be a tech expert to set it up.
In this guide, we’ll walk you through every step of setting up WordPress, from choosing a domain name to customizing your site’s design. You’ll learn how to pick the right hosting provider, install WordPress with ease, and start adding content in no time. By the end of this guide, you’ll have a fully functional website that looks great and works smoothly.
So, grab a cup of coffee, take a deep breath, and let’s dive into WordPress setup—step by step!
Step 1: Choosing the Right Domain Name and Hosting Provider
Before you can start building your WordPress website, you need two essential things: a domain name and a web hosting provider. Think of your domain name as your website’s address (like www.yourwebsite.com) and your hosting provider as the home where all your website’s files are stored. Choosing the right ones from the beginning is crucial for your site’s success.
1. Picking the Perfect Domain Name
Your domain name is the first thing visitors see, so it should be simple, memorable, and relevant to your website’s purpose. Here are a few tips to help you choose the best domain name:
- Keep it short and easy to spell – Avoid long or complex words that are hard to remember.
- Use keywords if possible – If your website is about baking, something like BestBakingTips.com can be helpful.
- Stick to .com if available – While there are many domain extensions (.net, .blog, .co), .com is the most popular and easiest to remember.
- Avoid numbers and hyphens – These can confuse visitors and make your domain harder to type.
- Check availability – Use domain registrars like Namecheap, GoDaddy, or Google Domains to see if your desired domain is available.
Once you find the perfect domain, register it immediately before someone else grabs it!
2. Choosing a Reliable Hosting Provider
Your hosting provider plays a big role in your website’s speed, security, and overall performance. For beginners, a managed WordPress hosting option is often the best choice because it simplifies setup and maintenance.
Here are some beginner-friendly hosting providers:
- Bluehost – Officially recommended by WordPress, great for beginners.
- SiteGround – Excellent performance and customer support.
- Hostinger – Affordable and beginner-friendly.
- WP Engine – Best for managed WordPress hosting with high performance.
When choosing a hosting provider, consider these factors:
- Ease of Use – Look for one-click WordPress installation and user-friendly dashboards.
- Performance & Speed – Faster websites improve user experience and SEO rankings.
- Security – SSL certificates, daily backups, and malware protection are essential.
- Customer Support – A responsive support team can save you a lot of trouble.
3. Buying Your Hosting Plan and Domain
Most hosting providers allow you to purchase a domain name and hosting together, making the process seamless. Here’s a quick step-by-step to get started:
- Visit your chosen hosting provider’s website and select a WordPress hosting plan.
- Register your domain name (if you haven’t already).
- Complete the purchase and follow the instructions to set up your hosting account.
Once you’ve secured your domain and hosting, you’re ready to move on to the next step—installing WordPress!
Stay tuned as we guide you through the installation process in the next step.
Step 2: Installing WordPress – Quick & Easy Setup
Now that you’ve secured your domain name and web hosting, it’s time to bring your website to life by installing WordPress. The good news? Most hosting providers offer a one-click WordPress installation, making it super easy even if you have no technical experience.
In this step, we’ll cover:
- How to install WordPress using one-click installation (recommended for beginners).
- How to install WordPress manually (for those who prefer a hands-on approach).
By the end of this guide, you’ll have your WordPress website up and running!
1. Installing WordPress Using One-Click Installation (Easiest Method)
Most beginner-friendly hosting providers like Bluehost, SiteGround, and Hostinger include a one-click WordPress installation. Here’s how to do it:
Step 1: Log in to Your Hosting Account
Once you’ve purchased your hosting plan, log in to your hosting provider’s dashboard. Look for a section called “Website” or “WordPress Installer.”
Step 2: Start the Installation Process
Click on “Install WordPress” or “Get Started” (the wording may vary depending on your hosting provider). You may be asked to select your domain name (the one you registered earlier).
Step 3: Enter Your Website Details
You’ll need to enter some basic information:
- Site Title – The name of your website (you can change this later).
- Username & Password – These will be used to log in to your WordPress dashboard. Choose something secure!
- Email Address – For password recovery and notifications.
Step 4: Click Install and Wait
Once you’ve filled in the details, click “Install” and wait a few minutes. When the installation is complete, you’ll receive a confirmation message with your WordPress login URL (usually yourwebsite.com/wp-admin).
Congratulations! You’ve successfully installed WordPress! Now, you can log in and start customizing your site.
2. Installing WordPress Manually (For More Control)
If your hosting provider doesn’t offer one-click installation, you can install WordPress manually. Here’s how:
Step 1: Download WordPress
Go to WordPress.org and download the latest version of WordPress.
2: Upload WordPress to Your Hosting Server
- Log in to your hosting cPanel and open the File Manager.
- Navigate to the public_html folder and upload the WordPress ZIP file.
- Extract the ZIP file to the same folder.
3: Create a Database
- In cPanel, find MySQL Databases and create a new database.
- Note down your database name, username, and password.
4: Configure WordPress
- Open your website URL in a browser.
- WordPress will ask for your database details—enter the info you saved earlier.
- Click “Submit”, then follow the on-screen setup instructions.
Once completed, your WordPress site will be live!
What’s Next?
Now that WordPress is installed, it’s time to customize your website by choosing a theme, installing essential plugins, and adding your first pages. Stay tuned for Step 3: Choosing the Right WordPress Theme to make your site look amazing!
Step 3: Choosing the Right WordPress Theme – Make Your Website Look Stunning
Now that you’ve installed WordPress, it’s time to make your website look amazing! The best way to do this is by selecting the right WordPress theme. A theme controls the overall design, layout, and appearance of your website without requiring any coding.
With thousands of free and premium WordPress themes available, choosing the right one might feel overwhelming. But don’t worry—I’ll guide you through the process step by step.
1. Understanding WordPress Themes
A WordPress theme is a pre-designed template that gives your website its structure, colors, fonts, and overall style. Some themes are simple and minimalist, while others are packed with advanced customization options.
There are two types of WordPress themes:
- Free Themes – Available in the WordPress theme directory (great for beginners).
- Premium Themes – Paid themes that offer more design options, faster performance, and dedicated support.
2. How to Choose the Best WordPress Theme
When selecting a theme, keep these factors in mind:
User-Friendly Design – Pick a theme that looks clean, modern, and easy to navigate.
Mobile Responsiveness – Your website must look good on desktops, tablets, and smartphones.
Fast Loading Speed – Avoid heavy themes that slow down your website.
Customization Options – Choose a theme that allows easy modifications (colors, fonts, layouts).
SEO-Friendly – A well-coded theme improves your site’s ranking on search engines.
Good Reviews & Support – Check ratings and read user feedback before installing a theme.
Popular beginner-friendly themes include:
- Astra – Lightweight, fast, and highly customizable.
- OceanWP – Great for blogs, eCommerce, and business websites.
- Neve – Simple, modern, and SEO-friendly.
- GeneratePress – A fast-loading theme with a clean design.
3. How to Install a WordPress Theme (Step-by-Step Guide)
Method 1: Installing a Free Theme from the WordPress Directory
1️⃣ Log into your WordPress Dashboard
- Go to Appearance > Themes in the left sidebar.
- Click “Add New” to browse available themes.
2️⃣ Search for a Theme
- Use the search bar to find a theme (e.g., “Astra” or “Neve”).
- Hover over the theme and click “Preview” to see how it looks.
3️⃣ Install and Activate
- Click “Install”, then click “Activate” once the installation is complete.
- Your new theme is now live!
Method 2: Uploading a Premium or Custom Theme
1️⃣ Purchase and download the theme’s .zip file from a marketplace like ThemeForest or the official theme website.
2️⃣ In your WordPress dashboard, go to Appearance > Themes > Add New.
3️⃣ Click “Upload Theme”, choose the .zip file, and hit “Install Now”.
4️⃣ After installation, click “Activate” to make the theme live on your site.
4. Customizing Your Theme
After activating your theme, go to Appearance > Customize to:
- Change colors and fonts
- Adjust the layout
- Add a logo
- Customize the homepage
This allows you to personalize your website and make it unique!
What’s Next?
With your theme installed, it’s time to enhance your website with essential WordPress plugins! Stay tuned for Step 4: Installing Must-Have Plugins to boost your website’s functionality.
Step 4: Installing Must-Have WordPress Plugins – Boost Your Website’s Functionality
Now that you have installed a WordPress theme and customized your site’s appearance, it’s time to add extra functionality with WordPress plugins.
A plugin is like an app for your website. It helps you add features like contact forms, SEO tools, security enhancements, and speed optimization—without needing to write a single line of code!
There are over 60,000 free plugins available in the WordPress Plugin Directory, plus thousands of premium plugins. But as a beginner, you don’t need all of them—just the essential ones to make your website run smoothly.
In this guide, we’ll cover:
What plugins are and why they are important
Must-have plugins for beginners
How to install and activate plugins
By the end of this step, your website will be faster, safer, and more powerful! 🚀
1. What Are WordPress Plugins?
A WordPress plugin is a small software add-on that extends the functionality of your website. Just like you install apps on your phone to get more features, you install plugins on WordPress to improve your site’s performance.
For example:
- Want to improve SEO? Install Yoast SEO.
- Need a contact form? Use WPForms.
- Want to speed up your site? Try WP Rocket.
The right plugins can save you time, effort, and money while making your site look and work better!
2. Must-Have WordPress Plugins for Beginners
Here are the top essential plugins every beginner should install:
🔹 SEO Optimization – Helps Your Site Rank on Google
Yoast SEO (Free & Paid)
- Optimizes your site for search engines.
- Helps you add meta titles, descriptions, and keywords.
🔹 Website Security – Protects Your Site from Hackers
Wordfence Security (Free & Paid)
- Scans for malware and blocks suspicious activity.
- Adds a firewall to keep your site safe.
🔹 Speed Optimization – Makes Your Website Load Faster
WP Rocket (Paid) or LiteSpeed Cache (Free)
- Speeds up your site by caching pages.
- Improves user experience and SEO rankings.
🔹 Contact Forms – Let Visitors Reach You Easily
WPForms (Free & Paid)
- Creates simple drag-and-drop contact forms.
- Lets visitors send messages directly to your email.
🔹 Backup Plugin – Keeps Your Website Data Safe
UpdraftPlus (Free & Paid)
- Backs up your website automatically.
- Lets you restore your site if something goes wrong.
🔹 Google Analytics – Tracks Your Website Visitors
MonsterInsights (Free & Paid)
- Connects Google Analytics to WordPress.
- Helps you see how many people visit your site and where they come from.
3. How to Install a WordPress Plugin (Step-by-Step Guide)
Method 1: Installing a Plugin from the WordPress Dashboard (Easiest Way)
1️⃣ Log in to your WordPress Dashboard
- Go to Plugins > Add New
2️⃣ Search for a Plugin
- Type the plugin name (e.g., “Yoast SEO”) in the search bar.
3️⃣ Install and Activate
- Click “Install Now”, then click “Activate” once the installation is complete.
Your plugin is now live!
Method 2: Uploading a Premium Plugin
If you purchased a premium plugin (e.g., WP Rocket), follow these steps:
1️⃣ Download the .zip file of the plugin from the official website.
2️⃣ In WordPress, go to Plugins > Add New > Upload Plugin.
3️⃣ Click “Choose File”, select the .zip file, and click “Install Now”.
4️⃣ Click Activate to enable the plugin.
Now your premium plugin is installed and ready to use!
What’s Next?
With your essential plugins installed, your WordPress site is faster, more secure, and easier to use. Now, it’s time to create important website pages like the Home Page, About Page, and Contact Page.
Stay tuned for Step 5: Creating Essential Website Pages to build a complete and professional-looking website!
Step 5: Creating Essential Website Pages – Build a Strong Foundation
Now that your WordPress site is set up with a great theme and essential plugins, it’s time to create the must-have pages that every website needs. These pages provide key information to visitors, improve user experience, and make your site look professional.
In this step, we’ll cover:
The 5 essential pages every website should have
How to create and edit pages in WordPress
Tips for making your pages engaging and user-friendly
By the end of this step, your website will look more complete and ready for visitors!
1. The 5 Essential Pages You Need
While every website is different, there are a few pages that almost every site should include:
1. Home Page – The First Impression
- This is the first page visitors see when they land on your website.
- It should clearly introduce your site’s purpose and direct visitors to key sections.
- Include a strong headline, a short introduction, and clear call-to-action (CTA) buttons (e.g., “Learn More” or “Contact Us”).
2. About Page – Share Your Story
- This page tells visitors who you are and what your website is about.
- Include a personal story, company background, or mission statement.
- Make it engaging by adding images or a short video introduction.
3. Contact Page – Make It Easy to Connect
- Helps visitors reach out to you via email, phone, or social media.
- Add a contact form (using the WPForms plugin).
- Include your business address if relevant (especially for local businesses).
4. Blog Page (If Needed) – Share Your Content
- If you plan to write articles, WordPress automatically creates a blog page.
- Go to Settings > Reading and choose a page for your blog posts.
- A blog helps with SEO and keeps your audience engaged with fresh content.
5. Privacy Policy Page – Stay Legally Compliant
- Required if you collect visitor data (e.g., emails, cookies, analytics).
- WordPress provides a built-in privacy policy template under Settings > Privacy.
- Modify it to reflect how you handle user data.
2. How to Create a New Page in WordPress
Creating pages in WordPress is easy! Just follow these steps:
1️⃣ Go to Your WordPress Dashboard
- Click Pages > Add New.
2️⃣ Enter Your Page Title
- Example: “About Us” or “Contact”.
3️⃣ Add Content
- Use the WordPress Block Editor (Gutenberg) to add text, images, buttons, and more.
4️⃣ Customize Layout (Optional)
- Click the “+” button to add elements like headings, images, and columns.
5️⃣ Publish Your Page
- Once you’re happy with the content, click Publish to make it live!
3. Tips for Making Your Pages Look Professional
Use High-Quality Images – Avoid blurry or generic stock photos.
Keep Text Easy to Read – Use short paragraphs and bullet points.
Add Clear Call-to-Actions (CTAs) – Tell visitors what to do next (e.g., “Contact Us”).
Ensure Mobile-Friendliness – Check how your pages look on mobile devices.
What’s Next?
Now that you have essential pages set up, it’s time to make your site search engine friendly! Stay tuned for Step 6: Optimizing Your Website for SEO to get more visitors from Google.
Step 6: Optimizing Your Website for SEO – Get Found on Google
Now that your WordPress website has essential pages, it’s time to make sure people can actually find it on Google. That’s where SEO (Search Engine Optimization) comes in!
SEO helps your website rank higher in Google search results, bringing in more visitors for free. Without proper SEO, your site may never reach its full potential.
In this step, we’ll cover:
What SEO is and why it’s important
The best WordPress SEO plugins
How to optimize your website for higher rankings
By the end of this step, your website will be search engine friendly and ready to attract more visitors!
1. What Is SEO and Why Does It Matter?
SEO (Search Engine Optimization) is the process of improving your website to rank higher in Google, Bing, and Yahoo search results.
Think about it: When people search for something online (e.g., “best baby products” or “how to start a blog”), they click on the top results. If your site isn’t optimized, it won’t show up—meaning no traffic and no visitors.
Good SEO helps you:
- Increase traffic to your website
- Get more leads, sales, or followers
- Build credibility and trust
Luckily, WordPress is already SEO-friendly, and with a few simple tweaks, you can boost your rankings!
2. Install an SEO Plugin (Must-Have for Beginners)
To make SEO easy, install a WordPress SEO plugin. Here are the best options:
Yoast SEO – Helps you optimize content, titles, and meta descriptions.
Rank Math – A beginner-friendly plugin with powerful SEO features.
All in One SEO (AIOSEO) – Great for automatic SEO optimization.
How to Install an SEO Plugin:
1️⃣ Go to Plugins > Add New in your WordPress dashboard.
2️⃣ Search for Yoast SEO (or your preferred plugin).
3️⃣ Click Install Now, then Activate.
4️⃣ Follow the setup wizard to optimize your site!
3. Basic SEO Optimization Tips
Now that you have an SEO plugin installed, follow these best practices to improve your rankings:
1. Optimize Your Page Titles and Meta Descriptions
- Your page title is what appears in Google search results.
- Your meta description is a short summary (about 150-160 characters).
- Make them clear, keyword-rich, and engaging to encourage clicks.
2. Use Keywords Naturally
- Keywords are the words people type into Google (e.g., “best travel tips”).
- Use relevant keywords in your blog posts, headings, and content—but don’t overdo it.
- Example: If your page is about healthy recipes, include phrases like “easy healthy meals” or “nutritious breakfast ideas”.
3. Improve Website Speed
- Google loves fast websites, and visitors do too!
- Install a caching plugin like WP Rocket or LiteSpeed Cache to boost speed.
- Optimize images using Smush or ShortPixel.
4. Make Your Website Mobile-Friendly
- Over 60% of users browse on mobile devices.
- Choose a responsive WordPress theme that looks great on all screens.
- Use Google’s Mobile-Friendly Test to check your site.
5. Use Internal and External Links
- Internal Links – Link to other pages on your website (helps visitors navigate and boosts SEO).
- External Links – Link to trusted sources (Google values high-quality references).
6. Create High-Quality Content
- Google prioritizes helpful, valuable content.
- Write blog posts, guides, and FAQs that solve user problems.
- Aim for at least 1,000+ words per post for better rankings.
4. Submit Your Site to Google Search Console
Google won’t find your website automatically—you need to submit it!
1️⃣ Go to Google Search Console.
2️⃣ Click “Start Now” and sign in with your Google account.
3️⃣ Enter your website URL and follow the verification steps.
4️⃣ Submit your sitemap (Yoast SEO generates one automatically).
Now, Google will start indexing your site so it can appear in search results!
What’s Next?
Now that your website is optimized for SEO, it’s time to start adding content! In Step 7: Writing Your First Blog Post, we’ll cover how to create engaging blog posts that attract readers and boost your traffic. Stay tuned!
Step 7: Writing Your First Blog Post – Share Your Ideas with the World
Now that your WordPress website is set up and optimized for SEO, it’s time to write and publish your first blog post! Blogging is one of the best ways to share your knowledge, attract visitors, and grow your website.
If you’ve never written a blog post before, don’t worry! In this step, we’ll cover:
How to create a new blog post in WordPress
Tips for writing engaging and SEO-friendly content
How to format and publish your post
By the end of this step, your first blog post will be live on your website, ready to attract readers!
1. How to Create a Blog Post in WordPress
Step 1: Access the WordPress Post Editor
1️⃣ Log into your WordPress dashboard.
2️⃣ Go to Posts > Add New.
This will open the WordPress block editor, where you can start writing!
Step 2: Add a Blog Title
- Your title should be clear, engaging, and relevant to your topic.
- Example: Instead of “Best Travel Tips,” try “10 Essential Travel Tips for First-Time Travelers”.
- Keep it under 60 characters so it displays properly on Google.
Step 3: Write Your Content
- The WordPress editor allows you to write, edit, and format your blog post easily.
- Use short paragraphs, bullet points, and subheadings to make it readable.
- Add images, videos, or infographics to make your post visually appealing.
2. Writing an Engaging and SEO-Friendly Blog Post
Here are some beginner-friendly tips to make your blog post stand out:
1. Start with an Attention-Grabbing Introduction
- The first few sentences should hook your reader.
- Example: “Struggling to plan your first international trip? Don’t worry! These 10 simple tips will make your journey stress-free.”
2. Use Subheadings for Easy Reading
- Break up long content with H2 and H3 subheadings.
- This makes your post easier to scan and improves SEO.
3. Write in a Conversational Tone
- Imagine you’re talking to a friend.
- Use simple words and avoid jargon.
4. Add a Call-to-Action (CTA)
- Tell your readers what to do next!
- Example: “Liked this post? Subscribe for more travel tips!”
3. Formatting and Adding Images
A well-formatted post looks professional and is easier to read.
Use Bullet Points & Numbered Lists – Makes key information stand out.
Bold Important Words – Helps readers find key points.
Insert Images – Go to “+” > Image Block and upload high-quality pictures.
Use Links – Add internal links (to your own posts) and external links (to useful resources).
4. Publishing Your Blog Post
Once your post is written and formatted, it’s time to publish it!
1️⃣ Preview Your Post
- Click “Preview” to see how it looks before publishing.
2️⃣ Add Categories & Tags
- Categories help organize posts (e.g., “Travel Tips”).
- Tags are specific keywords (e.g., “Budget Travel,” “Packing List”).
3️⃣ Set a Featured Image
- A featured image appears at the top of your blog post.
- Choose an eye-catching image related to your content.
4️⃣ Click “Publish”
- Your blog post is now live for the world to see!
What’s Next?
Congratulations! You’ve published your first blog post. But blogging isn’t just about writing—it’s about sharing and promoting your content.
In Step 8: Promoting Your Blog Post, we’ll cover how to drive traffic to your blog using social media, email marketing, and more. Stay tuned!
Step 8: Promoting Your Blog Post – Get More Readers and Traffic
Congratulations! You’ve published your first blog post. But here’s the truth: writing a great post isn’t enough—you also need to promote it. Without promotion, your blog might go unnoticed, no matter how valuable your content is.
In this step, we’ll cover:
Why blog promotion is important
The best ways to share your post and get traffic
How to keep growing your audience
By the end of this step, you’ll know how to bring more readers to your blog and start building an engaged audience.
1. Why Promoting Your Blog Matters
Imagine you’ve written the perfect blog post, but nobody knows about it. That’s like opening a new café in a hidden alley without any signs. People won’t find it unless you tell them about it!
Promoting your blog post helps you:
Get more visitors to your website
Increase shares, likes, and engagement
Build a loyal audience over time
Now, let’s dive into how to promote your blog post effectively.
2. Best Ways to Promote Your Blog Post
1. Share on Social Media
Social media is one of the fastest ways to bring traffic to your blog. Share your post on:
- Facebook (Join groups related to your topic)
- Twitter/X (Use relevant hashtags)
- Instagram (Post a story with a link)
- LinkedIn (Great for business or professional content)
- Pinterest (Create a beautiful pin linking to your post)
Pro Tip: Don’t just post once—reshare your content every few days!
2. Use Email Marketing
If you have an email list, send a newsletter announcing your new post. No email list yet? Start building one using Mailchimp or ConvertKit.
A simple email could say:
“Hey [Name], I just published a new post on [Topic]! Check it out here: [Link]”
3. Join Online Communities & Forums
Find Facebook Groups, Reddit, Quora, and other forums where your target audience hangs out. Answer questions and naturally mention your blog post when relevant.
Example:
Someone asks, “What are the best travel tips for beginners?”
You reply, “I just wrote a blog post on this! Here are 3 quick tips, and you can read the full guide here: [Link]”
✅ 4. Repurpose Your Content
Turn your blog post into different formats to reach a wider audience:
- Make a short video summarizing key points (Post on TikTok, Instagram, or YouTube Shorts)
- Turn it into a podcast episode
- Create an infographic (Great for Pinterest and Instagram)
5. Collaborate with Other Bloggers
Reach out to bloggers in your niche and ask for a guest post or content exchange. This helps both of you gain new audiences.
3. Keep Growing Your Audience
Promoting your blog is not a one-time thing—it’s an ongoing process. Here’s how to keep growing your traffic:
Post consistently (at least 1 blog per week)
Engage with your audience by replying to comments
Analyze what works using Google Analytics
Improve older blog posts by adding fresh content
What’s Next?
Now that your blog is getting more visitors, it’s time to monetize your website! In Step 9: Making Money from Your Blog, we’ll explore the best ways to earn income from your website. Stay tuned!
Step 9: Making Money from Your Blog – Turn Your Passion into Profit
Now that your blog is up and running, you might be wondering, “Can I make money from this?” The answer is YES! Many bloggers earn a full-time income by monetizing their content.
But making money from blogging doesn’t happen overnight. It takes strategy, consistency, and patience. In this step, we’ll explore:
Different ways to make money from your blog
How to choose the best monetization method for you
Tips for increasing your earnings over time
By the end of this step, you’ll have a clear roadmap to start earning from your blog!
1. Best Ways to Make Money from Your Blog
There are multiple ways to monetize a blog. You can choose one or mix a few depending on your niche and audience.
1. Display Ads (Google AdSense & More)
- One of the easiest ways to earn from blogging is through display ads.
- Google AdSense is a beginner-friendly option that pays you when people view or click on ads on your blog.
- Other ad networks include Ezoic and Mediavine (higher payouts but need more traffic).
- How much can you earn? It depends on your traffic. Bloggers with 50,000+ monthly views can make $500–$2,000 per month with ads alone.
2. Affiliate Marketing (Earn by Promoting Products)
- Affiliate marketing is when you promote products or services and earn a commission for every sale.
- Sign up for affiliate programs like:
Amazon Associates (Earn from Amazon product sales)
ShareASale, CJ Affiliate, Impact, and Rakuten (Find brands to partner with)
Hosting companies (like Bluehost or SiteGround) (Perfect for tech or business bloggers) - Add affiliate links to your blog posts, product reviews, or tutorials.
- Example: If you run a travel blog, you can promote travel gear, hotels, or flights and earn commissions!
3. Sell Your Own Digital Products
- If you want full control over your earnings, create and sell your own products!
- Examples of digital products you can sell:
E-books
Online courses (use Teachable or Udemy)
Printable planners, templates, or worksheets
Stock photos, music, or graphic design elements - Sell products directly on your website using WooCommerce or Easy Digital Downloads.
4. Offer Freelance Services
- Use your blog as a portfolio to attract clients.
- Offer services like:
Writing or copywriting
Graphic design
Social media management
Web design or development - Add a “Hire Me” page on your website to showcase your skills.
5. Sponsored Blog Posts
- Brands pay bloggers to write articles about their products.
- You can reach out to brands directly or sign up on platforms like:
Influence.co
Famebit
Collabor8 - Bloggers with high traffic and engagement can earn $100–$5,000+ per sponsored post!
2. How to Choose the Best Monetization Method
Not every monetization method works for every blogger. Here’s how to choose the best one for you:
1 If you have high traffic → Try ads and sponsored posts
2 If you love recommending products → Use affiliate marketing
3 If you have expertise in a topic → Sell digital products or courses
4 If you enjoy working with clients → Offer freelance services
You can start with one method, then add more as your blog grows!
3. Tips to Increase Your Blog Earnings
Focus on Quality Content – High-quality, helpful content attracts more traffic and increases earnings.
Grow Your Email List – Email subscribers are more likely to buy products or click on affiliate links.
Be Patient and Consistent – Making money from blogging takes time! Stay consistent, and the results will come.
What’s Next?
Now that you know how to monetize your blog, it’s time to scale up your website and take it to the next level! In Step 10: Growing and Scaling Your Blog, we’ll cover how to increase traffic, build a loyal audience, and maximize your success. Stay tuned!
Step 10: Growing and Scaling Your Blog – Take It to the Next Level
Congratulations! You’ve set up your blog, published content, promoted it, and even started monetizing it. But blogging isn’t just about getting started—it’s about growing and scaling your blog so it reaches more people and becomes a long-term success.
In this final step, we’ll cover:
How to increase your blog traffic
Building a loyal audience
Scaling your blog for long-term success
By the end of this step, you’ll have a solid strategy to keep your blog growing and thriving for years to come![WordPress setup guide][WordPress setup guide][WordPress setup guide][WordPress setup guide][WordPress setup guide]
1. Increase Your Blog Traffic
The more visitors your blog gets, the more opportunities you have to earn money and build a strong brand. Here’s how to attract more readers:[WordPress setup guide][WordPress setup guide][WordPress setup guide][WordPress setup guide][WordPress setup guide]
1. Master SEO (Search Engine Optimization)
- SEO helps your blog rank higher on Google, bringing free, organic traffic.
- Focus on:
Keyword Research – Use tools like Google Keyword Planner or Ubersuggest to find topics people search for.
On-Page SEO – Optimize titles, headings, and images with relevant keywords.
Internal Linking – Link to other posts on your blog to keep readers engaged.
Improve Site Speed – A fast website ranks better. Use tools like Google PageSpeed Insights to check your speed.
2. Use Pinterest & Social Media for Traffic
- Pinterest is a huge traffic source for bloggers. Create eye-catching pins linking to your blog posts.
- Stay active on platforms like Facebook, Instagram, Twitter/X, and LinkedIn to share new content.
- Join Facebook groups and Reddit communities in your niche and share helpful posts.
3. Repurpose Content for Different Platforms
- Turn blog posts into YouTube videos
- Make Instagram reels and TikToks with quick tips
- Summarize your posts in LinkedIn articles
- This helps you reach a wider audience without extra work!
2. Build a Loyal Audience
Traffic is great, but repeat visitors are even better! Here’s how to build a loyal community around your blog:[WordPress setup guide][WordPress setup guide][WordPress setup guide][WordPress setup guide][WordPress setup guide]
1. Start an Email List
- Email subscribers are your biggest fans—they engage with your content and are more likely to buy from you.
- Use Mailchimp, ConvertKit, or MailerLite to collect emails.
- Offer a freebie (like an ebook, checklist, or guide) to encourage people to subscribe.
2. Engage with Your Readers
- Reply to comments on your blog and social media.
- Ask your audience what topics they want you to cover.
- Run polls or Q&A sessions to keep them engaged.
3. Be Consistent
- Set a content schedule (e.g., 1-2 blog posts per week).
- The more consistently you post, the more trust and credibility you build.
3. Scale Your Blog for Long-Term Success
If you’re serious about turning your blog into a full-time business, here’s how to scale it:[WordPress setup guide][WordPress setup guide][WordPress setup guide][WordPress setup guide][WordPress setup guide]
1. Automate and Outsource
- As your blog grows, you might not have time to do everything yourself.
- Hire freelance writers, designers, or virtual assistants to help with tasks.
- Use automation tools like Buffer, Hootsuite, and Tailwind for social media posting.
2. Create Passive Income Streams
- Sell digital products, courses, or memberships to make money while you sleep.
- Build multiple income sources (ads, affiliate marketing, services, and products).
3. Network with Other Bloggers
- Collaborate with bloggers in your niche through guest posts, podcasts, or interviews.
- Join blogging communities to learn and grow together.
Final Thoughts: Your Blogging Journey Starts Now!
You’ve made it through all 10 steps of setting up, growing, and monetizing your blog! But remember—blogging is a journey, not a destination.
Keep learning, experimenting, and improving
Stay consistent and patient—growth takes time!
Enjoy the process—blogging should be fun and fulfilling!Now it’s time to take action and build the blog of your dreams. Go out there and make it happen!