

Introduction
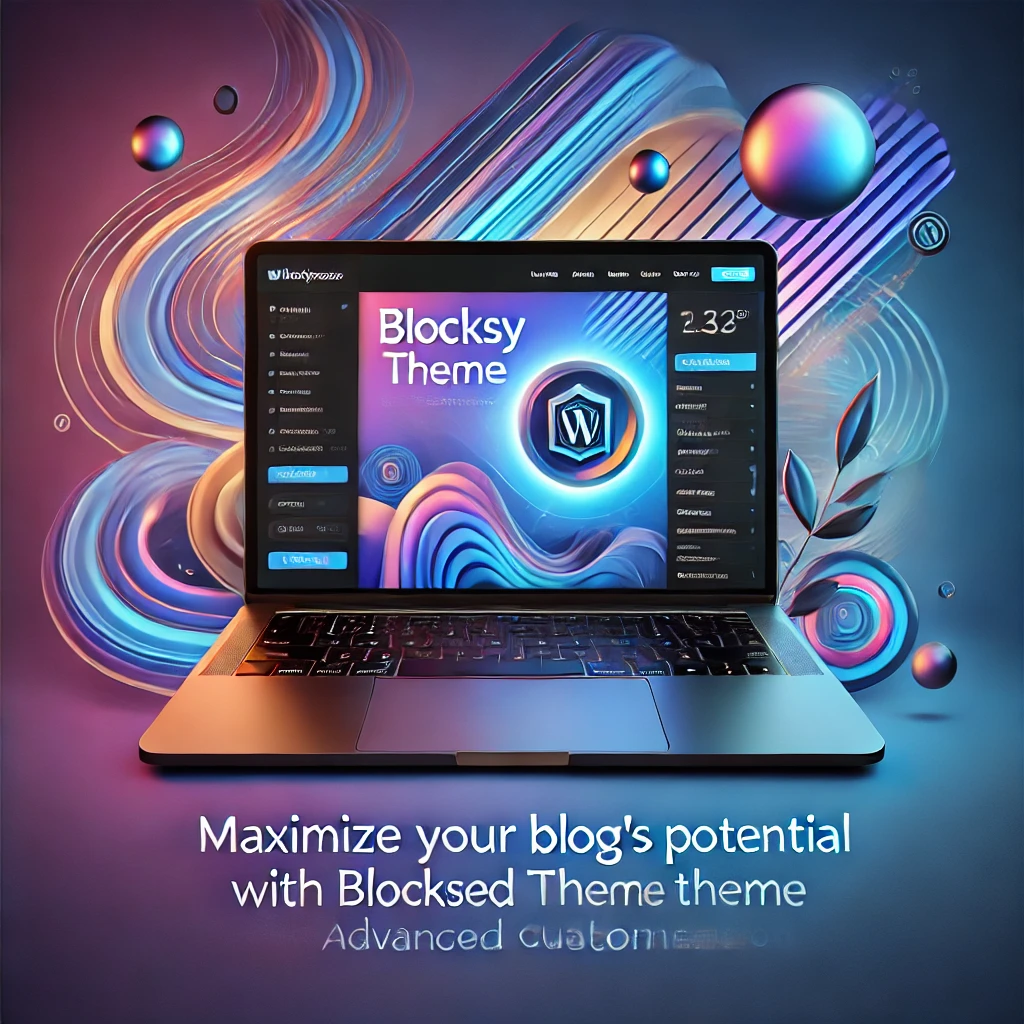
Your blog is more than just a collection of posts—it’s your platform, your voice, and your opportunity to connect with the world. So why settle for a cookie-cutter design? With the Blocksy Theme, you can unlock advanced customization options that make your blog truly yours.
Blocksy isn’t just a WordPress theme; it’s a powerhouse of design flexibility and user-friendly features. Whether you want to tweak layouts, fine-tune typography, or craft a unique color scheme, Blocksy gives you the tools to create a blog that stands out from the crowd. And the best part? You don’t need to be a coding expert to do it!
In this guide, we’ll explore how Blocksy’s advanced customization features—like its live preview builder, customizable header and footer, and global design settings—can help you elevate your blog to the next level. Whether you’re a beginner or a seasoned blogger, this theme empowers you to maximize your blog’s potential with ease and creativity. Ready to take control of your blog’s look and feel? Let’s dive in!
Step 1: Install and Activate the Blocksy Theme
If you’re looking to maximize your blog’s potential with the Blocksy theme, the first step is installing and activating it. This process is simple and beginner-friendly, so even if you’re new to WordPress, you’ll be up and running in no time.
Why Blocksy?
Blocksy is lightweight, fast, and packed with customization options. It’s perfect for bloggers who want a professional-looking site without needing to hire a developer or learn complex coding. By starting with this theme, you’re laying a solid foundation for a blog that’s visually appealing and highly functional.
How to Install the Blocksy Theme
Here’s a step-by-step guide to installing Blocksy on your WordPress site:
- Log In to Your WordPress Dashboard
- Open your web browser and go to your WordPress login page (usually yourdomain.com/wp-admin). Enter your username and password to access the dashboard.
- Navigate to the Themes Section
- In the WordPress dashboard, look for the Appearance tab on the left-hand menu. Click on it, then select Themes.
- Add a New Theme
- On the Themes page, you’ll see a button labeled Add New at the top. Click it to open the theme directory.
- Search for Blocksy
- In the search bar on the top right, type Blocksy. The Blocksy theme should appear in the results.
- Install the Theme
- Hover over the Blocksy theme card and click the Install button. WordPress will download and install the theme for you, which usually takes a few seconds.
- Activate the Theme
- Once the installation is complete, click the Activate button. This will make Blocksy the active theme on your website.
Installing the Blocksy Companion Plugin
To unlock the full potential of Blocksy, you’ll also need to install the Blocksy Companion plugin. This plugin enhances the theme by adding advanced customization options, demo templates, and additional features.
- Install the Plugin
- After activating the Blocksy theme, you’ll see a prompt at the top of your dashboard recommending the installation of the Blocksy Companion plugin. Click the Install Plugin button.
- Activate the Plugin
- Once installed, click the Activate button to enable the plugin’s features.
What’s Next?
With Blocksy and its companion plugin installed, your blog is ready to shine. At this point, your website has the basic framework for a modern, customizable design. But don’t stop here—this is just the beginning!
In the next steps, we’ll dive into customizing your site’s layout, choosing color schemes, and adding essential elements to make your blog unique. Stay tuned as we transform your WordPress site into a stunning blog that reflects your personality and brand.
By following this step, you’ve set the stage for a blog that’s not only visually appealing but also optimized for performance and user experience. Blocksy’s user-friendly design ensures that anyone, regardless of technical skill, can create a professional blog with ease.
Step 2: Customize the Site Identity and Global Settings
Now that you’ve installed and activated the Blocksy theme, it’s time to give your blog a personal touch by customizing the site identity and global settings. This step is essential because it establishes your blog’s branding and sets the tone for your content. Don’t worry—Blocksy’s intuitive interface makes it easy for beginners to navigate these settings.
What Is the Site Identity?
The site identity includes your blog’s name, tagline, and logo, which are the first elements visitors notice when they land on your site. Customizing these elements helps your blog stand out and communicate its purpose effectively.
How to Customize Site Identity
- Log In to Your Dashboard
- Access your WordPress dashboard by logging in with your credentials.
- Open the Customizer
- Navigate to Appearance > Customize. This will open the Blocksy theme’s live customizer, where you can make changes and preview them in real time.
- Go to Site Identity Settings
- In the customizer menu, click on Site Identity. Here, you’ll find options to modify your site title, tagline, and logo.
- Set Your Site Title and Tagline
- If you haven’t already, type in your blog’s name under the Site Title field. Use the Tagline field to add a short description of your blog’s purpose (e.g., “A blog about healthy living and wellness”).
- Upload a Logo
- Click on the Select Logo button to upload your blog’s logo. If you don’t have a logo yet, you can skip this step for now or create one using free tools like Canva.
- Site Icon (Favicon)
- Don’t forget to set a favicon (the small icon displayed on browser tabs). Upload a square image (at least 512×512 pixels) in the Site Icon section.
Customizing Global Settings
Blocksy’s global settings allow you to define site-wide design elements, ensuring consistency across all pages. Here’s how to adjust these settings:
- Typography
- Navigate to the Typography tab in the customizer. Choose fonts that align with your blog’s theme. For example, a clean sans-serif font works well for modern blogs, while a serif font adds a classic touch. Adjust font sizes, weights, and line spacing for better readability.
- Colors
- Head to the Colors tab to set your site’s primary and secondary color schemes. Pick a palette that reflects your brand identity. Blocksy provides a live preview, so you can see how changes affect your site instantly.
- Buttons and Links
- Customize button styles and link colors under the General or Colors settings. This ensures that interactive elements stand out and enhance user experience.
- Global Layout
- Blocksy lets you set a global layout for your blog, including options for boxed or full-width designs. Adjust these settings to match your vision for the blog.
Save and Publish
Once you’re happy with your customizations, click the Publish button at the top of the customizer to save your changes.
What’s Next?
With your site identity and global settings in place, your blog now has a cohesive and professional look. Next, we’ll explore customizing headers and navigation menus to improve functionality and guide visitors through your content seamlessly.
By completing this step, you’ve taken a significant step toward creating a blog that not only looks great but also resonates with your audience. Keep going—your stunning blog is coming together beautifully!
Step 3: Design a Stunning Header and Navigation Menu
Your website’s header and navigation menu are the first things visitors see, making them critical for creating a positive first impression. They serve as your blog’s guide, helping users quickly find the content they’re looking for. With the Blocksy Theme, designing a professional, user-friendly header and menu is simple, even for beginners.
What Makes a Good Header?
A well-designed header should be clean, visually appealing, and functional. It typically includes your logo, site title, navigation menu, and sometimes additional elements like a search bar or social media links. The goal is to make it easy for visitors to understand your blog’s purpose and access its content.
How to Customize Your Header in Blocksy
- Open the Customizer
- Log in to your WordPress dashboard, navigate to Appearance > Customize, and select the Header section.
- Understand the Header Builder
- Blocksy features a drag-and-drop header builder that allows you to create a header layout tailored to your needs. It’s divided into three rows: top, middle, and bottom. Each row can hold elements like your logo, menu, buttons, and widgets.
- Add Your Logo
- Drag the Logo element to the desired position in your header layout. Click on it to upload your logo image or choose one from your media library. Adjust its size to ensure it looks balanced with other header elements.
- Set Up the Navigation Menu
- Drag the Primary Menu element into your header layout. To create or edit your menu:
- Go back to the WordPress dashboard and navigate to Appearance > Menus.
- Create a new menu, give it a name (e.g., “Main Menu”), and add pages, categories, or custom links.
- Save the menu and assign it to the Primary Menu location in the customizer.
- Drag the Primary Menu element into your header layout. To create or edit your menu:
- Customize Header Elements
- Add other elements like a search bar, social media icons, or a call-to-action button. For example, a button labeled “Subscribe” can direct users to your email sign-up page.
- Use Blocksy’s settings to adjust spacing, colors, and typography for a polished look.
Best Practices for Navigation Menus
- Keep It Simple: Limit your menu to essential items like “Home,” “About,” “Blog,” and “Contact.” Avoid overwhelming visitors with too many options.
- Use Drop-Downs: For a cleaner design, group related pages or categories under drop-down menus. For instance, group all blog categories under a “Blog” menu item.
- Highlight Important Links: Use bold colors or a button style for critical links like “Sign Up” or “Shop.”
Optimize for Mobile
With most users accessing websites on mobile devices, ensure your header is responsive:
- Switch to the mobile view in the customizer to preview your header.
- Adjust spacing and hide non-essential elements for a clean mobile layout.
Save Your Customizations
Once you’re satisfied with your header and menu design, click Publish to save your changes.
What’s Next?
Your header and navigation menu are now ready, providing visitors with a seamless browsing experience. In the next step, we’ll focus on designing your homepage to make it visually compelling and informative.
By completing this step, you’ve created a header that’s not just aesthetically pleasing but also highly functional—ensuring your audience stays engaged and navigates your blog effortlessly.
Step 4: Create and Design an Engaging Homepage
Your homepage is the face of your blog—it’s often the first thing visitors see and can determine whether they stay or leave. With the Blocksy Theme, you can create a visually stunning and functional homepage that immediately captures attention and guides visitors to explore more.
Why Does Your Homepage Matter?
A well-designed homepage sets the tone for your blog. It provides visitors with a clear understanding of what your blog is about while showcasing your best content. Whether you’re running a personal blog, niche website, or online store, an engaging homepage helps build credibility and encourages users to stay longer.
Step-by-Step Guide to Creating Your Homepage
- Set a Static Homepage
By default, WordPress displays your latest posts on the homepage. For a more customized look:- Go to Settings > Reading in your dashboard.
- Select the A static page option.
- Choose a page to serve as your homepage and another for your blog posts (if applicable). If you don’t have a page created yet, go to Pages > Add New to create one.
- Open the Customizer
- Navigate to Appearance > Customize, then select Homepage Settings to ensure your chosen page is displayed.
Design Elements for Your Homepage
- Hero Section
- This is the topmost section of your homepage. It’s an opportunity to make a strong first impression.
- Use Blocksy’s customizer or a page builder like Elementor or Gutenberg to add a hero image, catchy headline, and call-to-action (CTA) button (e.g., “Read More” or “Subscribe”).
- About Section
- Include a short paragraph introducing yourself or your blog.
- Add an image to make this section more personal and relatable. For example:
- “Hi! I’m [Your Name], and I’m passionate about [your blog topic]. Welcome to my space where I share insights, tips, and stories about [your niche]!”
- Featured Content or Blog Posts
- Showcase your best or latest posts to keep visitors engaged. Blocksy allows you to create a section that dynamically displays your blog posts with featured images, titles, and excerpts.
- Use categories to organize your content and make it easier for readers to navigate.
- Call-to-Action Section
- Encourage visitors to take specific actions, such as signing up for your newsletter, joining your community, or exploring your store.
- Use a bold headline, short description, and eye-catching button.
- Testimonials or Social Proof
- If applicable, include testimonials, reader comments, or social proof to establish credibility. This is especially useful for business blogs or service providers.
- Footer with Navigation and Contact Information
- Add important links like “Privacy Policy,” “Terms of Service,” and “Contact.”
- Include your social media icons for easy connection.
Tips for Designing Your Homepage
- Keep It Clean: Avoid clutter. Stick to essential sections and use white space to make your design breathable.
- Choose Eye-Catching Colors: Use the global color palette you set earlier in the customizer for consistency.
- Optimize for Mobile: Preview your homepage in mobile view and adjust fonts, buttons, and spacing accordingly.
Save and Publish
Once your homepage is ready, click the Publish button in the customizer to make it live.
What’s Next?
Your homepage is now designed to engage visitors and guide them deeper into your blog. In the next step, we’ll focus on creating essential pages like “About,” “Contact,” and “Privacy Policy” to complete your website’s structure.
With your homepage done, you’ve created a welcoming, professional front door to your blog that reflects your brand and invites visitors to stay longer. Great job!
Step 5: Create Essential Pages for Your Blog
Every blog needs foundational pages that provide important information and enhance user experience. These pages build trust with your audience, improve navigation, and provide critical details about your blog’s purpose, policies, and contact information. In this step, you’ll learn how to create and design the must-have pages for your WordPress blog using the Blocksy Theme.
Why Are Essential Pages Important?
Essential pages ensure your blog looks professional, is user-friendly, and meets legal requirements. They allow readers to:
- Learn more about you and your blog.
- Get in touch with you.
- Understand your policies regarding privacy, cookies, and terms of service.
The Must-Have Pages
- About Page
The About Page tells visitors who you are, what your blog is about, and why it exists.- Go to Pages > Add New in your WordPress dashboard and name the page “About.”
- Add a short, engaging bio that explains your story, passions, and what visitors can expect from your blog.
- Include a photo of yourself or your team to add a personal touch.
- Use headings, bullet points, or a timeline to make the content skimmable.
- Contact Page
This page allows visitors to reach out to you for inquiries, feedback, or collaboration opportunities.- Create a new page and name it “Contact.”
- Use a contact form plugin like WPForms or Contact Form 7 to make it easy for users to message you.
- Include additional contact details, such as an email address or social media links.
- If applicable, embed a Google Map to show your physical location.
- Privacy Policy Page
This page informs users about how you collect, store, and use their data. It’s a legal requirement for many websites.- WordPress offers a pre-written Privacy Policy template. Navigate to Settings > Privacy to access it.
- Customize the content to match your blog’s practices.
- Add the page to your footer or menu for easy access.
- Terms of Service Page
This page outlines the rules for using your website. It’s particularly important for blogs with e-commerce features or memberships.- Similar to the Privacy Policy, you can use an online generator or consult legal resources to draft a Terms of Service page.
- Disclaimer Page (Optional)
If you’re running a niche blog (e.g., health, finance, or legal), a disclaimer page clarifies that your content is for informational purposes only.
Designing These Pages with Blocksy
- Use Custom Layouts: Blocksy allows you to create unique layouts for each page. Customize headers, colors, and typography to align with your blog’s design.
- Add Visual Elements: Include images, icons, or graphics to make the pages visually appealing.
- Keep It Simple: Essential pages don’t need to be overly complex. Focus on clarity and readability.
Organizing These Pages
Once your pages are created, make them easy to find by adding them to your navigation menu:
- Go to Appearance > Menus in your WordPress dashboard.
- Add the pages to your main menu or footer menu.
- Organize them logically (e.g., “About,” “Contact,” and “Privacy Policy” in the footer).
Final Touches
- Proofread: Check for grammar errors and ensure all links work properly.
- Test Responsiveness: View the pages on mobile devices to ensure they look great across all screens.
- Publish and Promote: Once everything is ready, hit Publish for each page.
What’s Next?
With your essential pages set up, your blog now looks professional and provides the information visitors need. In the next step, we’ll explore how to optimize your blog for search engines, ensuring it reaches a wider audience.
By completing this step, you’ve laid a solid foundation for your blog’s functionality and user experience—well done!
Step 6: Optimize Your Blog for Search Engines (SEO)
Creating a beautiful blog is just the beginning. To reach a larger audience, your blog needs to be optimized for search engines like Google. Search Engine Optimization (SEO) is the process of improving your site’s visibility on search engines, so it appears higher in search results. This step will guide you through beginner-friendly ways to implement SEO on your blog using the Blocksy Theme and essential WordPress tools.
Why is SEO Important?
SEO ensures that your blog reaches the right audience by improving its ranking on search engines. A well-optimized blog attracts organic traffic, boosts credibility, and helps you achieve your blogging goals, whether it’s gaining more readers or increasing sales.
Step-by-Step SEO for Beginners
Install an SEO Plugin
- Navigate to Plugins > Add New in WordPress.
- Search, install, and activate plugins like Yoast SEO or Rank Math.
Optimize Your Blog Posts
- Research keywords using tools like Google Keyword Planner.
- Add keywords naturally to titles, URLs, headings, and meta descriptions.
- Write engaging meta descriptions with keywords included.
Customize Permalinks
- Go to Settings > Permalinks and choose the “Post name” option for clean URLs (e.g., yourblog.com/how-to-blog).
Optimize Images
- Compress images using TinyPNG or plugins like Smush.
- Add descriptive alt text for better SEO and accessibility.
Improve Site Speed
- Use caching plugins like WP Rocket or LiteSpeed Cache.
- Enable a CDN like Cloudflare for faster global performance.
Ensure Mobile-Friendliness
- Test your site on various devices.
- Use Blocksy’s mobile customization to optimize fonts, spacing, and layouts.
Build Internal Links
- Link to related posts within your content to boost SEO and reader engagement.
Create a Sitemap
- Generate a sitemap with your SEO plugin and submit it via Google Search Console.
Monitor Your Progress
After implementing these optimizations, monitor your blog’s performance:
- Use Google Analytics to track traffic and user behavior.
- Regularly review Google Search Console to identify and fix any SEO issues.
What’s Next?
Congratulations! Your blog is now primed to attract more visitors from search engines. In the next step, we’ll focus on creating valuable and engaging content to keep your audience coming back for more.
By following these SEO basics, you’re setting your blog up for long-term success—great work!
Step 7: Create Engaging and Valuable Content for Your Blog
Now that your blog is optimized and ready to go, it’s time to focus on what matters most—your content. High-quality, engaging, and valuable content is the heart of your blog. It not only attracts visitors but also keeps them coming back for more. In this step, we’ll explore how to create content that resonates with your audience and establishes your blog as a trusted resource.
Why Does Quality Content Matter?
Content is the key to building your blog’s credibility, visibility, and audience engagement. Great content helps you:
- Solve problems for your readers.
- Establish authority in your niche.
- Drive traffic through organic shares and SEO.
Step-by-Step Guide to Creating Great Content
Understand Your Audience
- Identify their pain points, questions, and goals.
- Use tools like Google Trends or Quora to find trending topics.
- Engage through comments, polls, or surveys to learn what they need.
Choose the Right Content Formats
- Try formats like how-to guides, listicles, reviews, or case studies.
- Use infographics or visuals to simplify complex ideas.
Plan Your Content Strategically
- Create a calendar for timely and evergreen posts.
- Schedule content around seasons, holidays, or trends.
Write Compelling Headlines
- Use numbers, questions, or action verbs (e.g., “5 Tips to Master Time Management”).
- Ensure relevance to your audience’s needs.
Craft Valuable Content
- Write in a simple, conversational tone.
- Use headings, bullet points, and short paragraphs for readability.
- Support claims with data, examples, or stories and offer actionable takeaways.
Incorporate SEO
- Use keywords naturally and optimize headings, meta descriptions, and images.
- Link to relevant internal and external resources.
Make It Visually Appealing
- Add images, charts, or infographics.
- Use clean layouts and ensure proper font sizes and spacing.
Add a Call-to-Action (CTA)
- Encourage feedback, newsletter subscriptions, or promote related posts.
Publishing and Promoting Your Content
- Proofread: Check for grammar, spelling, and formatting errors before publishing.
- Promote on Social Media: Share your posts on platforms like Facebook, Twitter, and LinkedIn.
- Engage with Readers: Respond to comments and questions to build a sense of community.
What’s Next?
With engaging and valuable content, your blog becomes a destination for readers looking for reliable information. In the next step, we’ll dive into strategies for promoting your blog and expanding your reach.
Creating amazing content is your path to connecting with your audience, so take your time and enjoy the process—you’re doing great!
Step 8: Promote Your Blog to Reach a Wider Audience
You’ve optimized your blog and created engaging content, but now it’s time to let the world know about it! Promotion is an essential step to attract readers, build your audience, and establish your blog as a valuable resource in your niche. In this guide, you’ll learn simple, beginner-friendly ways to effectively promote your blog.
Why Promotion Matters
Even the best content won’t perform if no one knows it exists. Promotion helps:
- Increase your blog’s visibility.
- Drive consistent traffic to your website.
- Connect with potential collaborators and build relationships in your niche.
Step-by-Step Guide to Promoting Your Blog
Leverage Social Media
- Focus on platforms your audience uses (e.g., Instagram, Twitter, LinkedIn).
- Share posts consistently with engaging captions, hashtags, and visuals.
- Respond to comments and participate in conversations to grow a loyal following.
Utilize Email Marketing
- Use tools like Mailchimp or ConvertKit to create newsletters.
- Offer a freebie (e.g., ebook or guide) as a subscription incentive.
- Personalize emails to improve engagement and retention.
Join Online Communities
- Share posts in relevant Facebook groups and forums like Reddit or Quora.
- Contribute valuable insights and link to your blog when appropriate.
- Join blogging platforms like Medium to connect with like-minded creators.
Collaborate with Influencers
- Write guest posts for niche blogs to reach a broader audience.
- Partner with experts for interviews or cross-promotions.
- Request social media mentions in exchange for mutual benefits.
Optimize for Shareability
- Add social sharing buttons with plugins like Social Snap.
- Craft attention-grabbing headlines suited for platforms like Pinterest.
- Encourage readers to share your content in every post.
Track Performance
- Use tools like Google Analytics to monitor traffic and refine strategies.
Pro Tips for Consistent Promotion
- Repurpose content: Turn blog posts into videos, infographics, or podcast episodes to reach more audiences.
- Engage daily: Consistency is key. Spend a few minutes every day promoting your blog and interacting with your audience.
- Celebrate milestones: Share successes, like reaching a traffic goal or publishing your 10th post, to keep readers excited.
What’s Next?
Promoting your blog is an ongoing process. The more effort you put into spreading the word, the more readers you’ll attract. In the next step, we’ll explore how to monetize your blog and turn it into a source of income.
You’re one step closer to building a successful blog—keep it up!
Step 9: Monetize Your Blog to Generate Income
Congratulations! You’ve built a blog, created valuable content, and promoted it effectively. Now, it’s time to explore ways to monetize your blog and turn your passion into a source of income. While blogging takes time to grow into a profitable venture, this step-by-step guide will help you understand beginner-friendly monetization methods that can work for your blog.
Why Monetize Your Blog?
Monetization allows you to:
- Earn passive income while doing something you love.
- Cover blog-related expenses like hosting and plugins.
- Invest in tools or resources to enhance your blog’s growth.
Step-by-Step Guide to Blog Monetization
Display Ads
- Join ad networks like Google AdSense, Mediavine, or Ezoic.
- Place ads strategically (e.g., banners, sidebars) to avoid disrupting user experience.
- Focus on increasing traffic to boost revenue.
Affiliate Marketing
- Sign up for programs like Amazon Associates or ShareASale.
- Promote products relevant to your niche that you trust.
- Add affiliate links in reviews, guides, or resource pages.
Sponsored Content
- Pitch collaboration ideas to brands targeting your audience.
- Set clear terms for deliverables and payment.
- Always disclose sponsored posts to maintain transparency.
Sell Digital Products
- Create and sell ebooks, guides, templates, or online courses.
- Focus on topics that align with your audience’s interests.
Offer Services
- Promote skills like freelancing, consulting, or hosting workshops.
- Use your blog to attract clients and showcase expertise.
Membership or Subscriptions
- Provide premium content like exclusive articles or resources.
- Use tools like MemberPress or Patreon to manage memberships.
Sell Merchandise or Dropshipping
- Set up a store using WooCommerce to sell branded or niche products.
- Promote items through your blog and social media.
Tips for Beginners
- Start Small: Begin with one monetization method and expand as your blog grows.
- Focus on Value: Prioritize your audience’s needs and ensure monetization methods align with their interests.
- Track Earnings: Use tools like Google Analytics and affiliate dashboards to monitor your progress.
What’s Next?
Monetizing your blog is a rewarding journey, but it requires patience and persistence. In the final step, we’ll cover how to maintain and grow your blog for long-term success. You’ve come so far—let’s finish strong!
Step 10: Maintain and Grow Your Blog for Long-Term Success
Congratulations on reaching the final step! By now, your blog is live, filled with valuable content, promoted effectively, and even monetized. However, blogging is an ongoing process that requires consistent effort to maintain and grow. This last step will guide you through strategies to ensure your blog remains successful, relevant, and continually evolving.
Why Maintenance is Key
Maintaining your blog ensures:[Blocksy Theme Customization][Blocksy Theme Customization][Blocksy Theme Customization][Blocksy Theme Customization][Blocksy Theme Customization]
- A seamless user experience for visitors.
- Higher search engine rankings through updated and optimized content.
- Continued audience growth and monetization opportunities.
Step-by-Step Guide to Maintaining and Growing Your Blog
Regularly Update Content
- Refresh old posts with updated stats and insights.
- Fix broken links using tools like Broken Link Checker.
- Repurpose popular content into videos, infographics, or podcasts.
Monitor Website Performance
- Check speed with tools like Google PageSpeed Insights and optimize loading times.
- Use Google Analytics to track traffic and top-performing content.
- Keep plugins and themes updated for security and functionality.
Engage with Your Audience
- Respond to comments and interact with readers.
- Share posts on social media and participate in discussions.
- Send newsletters to inform subscribers of new updates and offers.
Optimize for SEO
- Target trending keywords and improve internal linking.
- Build backlinks by collaborating with other bloggers.
Experiment with New Content Formats
- Create videos, host webinars, or introduce interactive elements like polls or quizzes.[Blocksy Theme Customization][Blocksy Theme Customization][Blocksy Theme Customization][Blocksy Theme Customization][Blocksy Theme Customization]
Build a Community
- Start a Facebook group or host webinars to connect with readers.
- Encourage guest contributions for fresh perspectives.
Plan for Growth
- Publish regularly and explore new monetization strategies.
- Collaborate with brands to enhance reach and credibility.
By following these steps, you’ll keep your blog engaging, relevant, and set for long-term success.[Blocksy Theme Customization][Blocksy Theme Customization][Blocksy Theme Customization][Blocksy Theme Customization][Blocksy Theme Customization]
Pro Tips for Long-Term Success
- Stay Consistent: Set a realistic blogging schedule and stick to it.
- Learn Continuously: Follow blogging trends, take online courses, and stay updated on industry changes.
- Be Patient: Building a successful blog takes time. Celebrate small milestones along the way.
What’s Next?
Your blogging journey is just beginning. By maintaining and growing your blog, you’ll not only create a valuable resource for your readers but also establish a sustainable online presence. Remember, success comes with consistent effort, creativity, and adaptability.
Here’s to your blogging success—keep going, and never stop learning![Blocksy Theme Customization][Blocksy Theme Customization][Blocksy Theme Customization][Blocksy Theme Customization][Blocksy Theme Customization]
PREVIOUS TOPIC : Boost Your Website Speed Instantly with Blocksy Theme – Here’s How!