Introduction
Creating stunning and functional web pages doesn’t have to require coding knowledge or hiring a developer. With Kadence Blocks, you have the power to build advanced, professional page layouts right from your WordPress editor. Kadence Blocks is a powerful block editor plugin that works seamlessly with the Kadence Theme, giving you access to flexible design options and intuitive tools for customization.
Whether you’re designing a homepage, a landing page, or product pages, Kadence Blocks offers a variety of pre-designed templates, layouts, and advanced design options that make it easy for beginners and experienced users alike to bring their vision to life. It combines simplicity with functionality, allowing you to design visually appealing, user-friendly pages without needing any technical expertise.
The best part? Kadence Blocks allows you to create layouts with drag-and-drop ease, saving time and effort while providing complete creative control. From customizing rows and columns to adding dynamic features like sliders, buttons, or interactive sections, the possibilities are endless.
In this guide, we’ll explore how you can use Kadence Blocks for advanced page layouts, step-by-step. You’ll learn how to make the most of its intuitive tools to design professional pages, align elements seamlessly, and create layouts that engage your audience. Whether you’re setting up a new blog, an eCommerce store, or a portfolio website, mastering Kadence Blocks will give your website a polished and unique look.
Let’s dive in and unlock the full potential of Kadence Blocks together!
Step 1: Understanding Kadence Blocks and Its Purpose
Before diving into designing advanced page layouts, it’s important to familiarize yourself with Kadence Blocks and understand how they can transform the way you build pages on WordPress. If you’re new to this powerful tool, don’t worry! Kadence Blocks is beginner-friendly, intuitive, and packed with features that make it simple to design stunning pages without coding.
What Are Kadence Blocks?
Kadence Blocks is a versatile and user-friendly block editor plugin that works seamlessly with WordPress. Designed to extend the capabilities of the default WordPress block editor (Gutenberg), Kadence Blocks offers a variety of advanced design tools and pre-built templates to help you create beautiful, responsive, and professional web pages.
With Kadence Blocks, you can build complex page layouts, insert interactive design elements, and make the most out of the WordPress block editor while maintaining complete flexibility. Whether you want to create a landing page, a portfolio, a product showcase, or a homepage, Kadence Blocks makes it easier by offering tools that streamline the design process.
Why Use Kadence Blocks?
So, why should you use Kadence Blocks? Here are just a few reasons:
- Beginner-Friendly: You don’t need advanced coding or technical skills. Kadence Blocks uses a drag-and-drop interface, allowing anyone to design layouts with ease.
- Pre-made Templates: Kadence Blocks provides ready-to-use templates and patterns that you can insert into your page and customize to save time.
- Advanced Design Features: Customize elements like columns, sliders, buttons, testimonials, galleries, and more with just a few clicks.
- Responsive Design: Kadence Blocks ensures that the pages you create look great on any device, from mobile phones to tablets and desktops.
- Integration with Kadence Theme: If you’re using Kadence Theme, Kadence Blocks integrates perfectly to give you even more design options and enhanced website-building capabilities.
Understanding how to use Kadence Blocks will give you the ability to create visually engaging pages that align with your brand’s style and your website’s goals.
How Kadence Blocks Can Elevate Your Website
Kadence Blocks allows you to design layouts in a modular way by adding, editing, and arranging individual blocks. These blocks can represent everything from images and text to sliders, CTA (Call-to-Action) buttons, galleries, forms, and other dynamic content elements. With advanced customization options like row and column layouts, gradients, animations, and visibility controls, Kadence Blocks provides limitless opportunities to design websites that not only look great but also function smoothly.
Kadence Blocks can streamline workflows by replacing complicated coding with simple visual editing. For beginners, this means that you don’t need to spend time learning how to write HTML, CSS, or JavaScript. Instead, you can design entire pages directly from the visual editor by dragging and dropping blocks into place and tweaking settings with a few clicks.
Additionally, with Kadence Blocks, you can easily create layouts that match your website’s branding and business objectives. Whether you’re designing for an online store, blog, or service-based business, you can make your website user-friendly and visually appealing by utilizing the various block options provided.
Final Thoughts on Understanding Kadence Blocks
Getting familiar with Kadence Blocks is the first step toward building advanced, customized, and professional-looking WordPress pages. While it may look simple at first glance, once you explore its many features, you’ll discover how much flexibility and creativity you can bring to your website.
By learning how to effectively use Kadence Blocks, you’re setting the foundation for designing responsive pages that engage visitors, boost conversions, and elevate your website’s user experience.
In the next step, we’ll explore how to navigate the Kadence Blocks interface and start creating page layouts using its intuitive tools and templates. So, whether you’re designing your homepage, a landing page, or any other website page, understanding these features will empower you to bring your vision to life easily. Let’s keep building from here!
Step 2: Navigating the Kadence Blocks Interface
Now that you have a clear understanding of what Kadence Blocks are and how they can enhance your WordPress experience, it’s time to familiarize yourself with the Kadence Blocks interface. Before you can start building advanced page layouts, knowing how to navigate the interface will make the design process much smoother. Don’t worry—Kadence Blocks is beginner-friendly, and this step will give you all the information you need to get started confidently.
Understanding the Interface
When you install and activate Kadence Blocks on your WordPress website, you’ll find its features integrated directly into the WordPress block editor (Gutenberg). The Kadence Blocks interface is intuitive, but here’s what you need to know about navigating it:
- The Block Editor Dashboard:
When editing a page or creating a new one in WordPress, you’ll access the block editor dashboard. This is where you’ll see all the tools and block options at your disposal. Kadence Blocks adds a variety of new options here to help you design advanced layouts. - Kadence Blocks Toolbar:
Once you select a Kadence Block, you’ll notice the Kadence Blocks toolbar appear at the top of the block editor. This toolbar allows you to quickly access options to customize the block you’ve selected, such as adjusting colors, padding, margins, visibility settings, or animations. - Block Categories:
Kadence Blocks organizes its tools into categories to make it easy to find what you need. These categories include:- Layout Options: Rows, Columns, and Layout Settings.
- Content Elements: Buttons, Forms, Sliders, Testimonials, and Galleries.
- Design Elements: Gradient backgrounds, animations, and visibility settings.
- Global Settings:
Kadence Blocks allows you to set global design settings that apply across multiple pages. This feature is particularly useful if you want consistent styling for elements like buttons or headings across your entire website.
How to Access Kadence Blocks in the Editor
To get started with Kadence Blocks, follow these simple steps:
- Go to your WordPress dashboard.
- Navigate to Pages > Add New (or edit an existing page).
- You’ll now use the default WordPress editor (Gutenberg). Look for the + icon to add new blocks.
- Search for Kadence Blocks under the “Search for a block” section or use the pre-defined Kadence Blocks categories.
Once you add a Kadence Block to your page, the Kadence Blocks toolbar will give you full access to customization options for that specific element. From here, you can start editing, designing, and creating the layouts you want.
Exploring the Most Popular Kadence Blocks
Kadence Blocks offers a variety of blocks that you’ll use frequently. Here are a few of the most popular ones for beginners:
- Row Layout Block: Create rows and column-based structures to organize your page’s content.
- Columns Block: Divide your page into multiple columns for creative and professional layouts.
- Button Block: Add Call-To-Action (CTA) buttons that are fully customizable.
- Slider Block: Showcase images or key offers with an eye-catching slider.
- Testimonials Block: Build credibility by featuring customer reviews.
- Gallery Block: Easily add image galleries to highlight your products or services.
Each block has simple customization options that allow you to style its design, layout, or visibility to ensure it aligns with your website’s goals.
Quick Tips for Navigating the Interface Like a Pro
Here are some tips to help you save time and make the most of Kadence Blocks as a beginner:
- Use the Block Search Bar: The search bar is your best friend! Type in block names like “Row Block,” “Button,” or “Gallery” to quickly find the block you want.
- Preview Your Changes: Always preview your page to ensure the changes you make are visually appealing and functional on both mobile and desktop devices.
- Experiment with Global Design Settings: By setting global settings like colors, fonts, and spacing, you save time and ensure a uniform look across your website.
- Learn the Toolbar Options: Spend some time exploring the Kadence Blocks toolbar for each block. Options like advanced padding, visibility toggles, and animations can give you unique design flexibility.
Why Navigating the Interface is Crucial for Success
Learning to navigate the Kadence Blocks interface allows you to access all the design features available without feeling overwhelmed. Once you’re comfortable with the layout editor, toolbar options, and customization settings, you’ll find it much easier to create complex page designs and build advanced layouts for your WordPress site.
With the Kadence Blocks interface under your belt, you’re ready to move on to designing your first advanced page layout! Keep practicing, experimenting, and building confidence with each design choice. You’ll be amazed at how versatile and fun Kadence Blocks can be when you fully explore its features.
Let’s move to the next step and start putting what you’ve learned into action.
Step 3: Setting Up Your First Kadence Block Page Layout
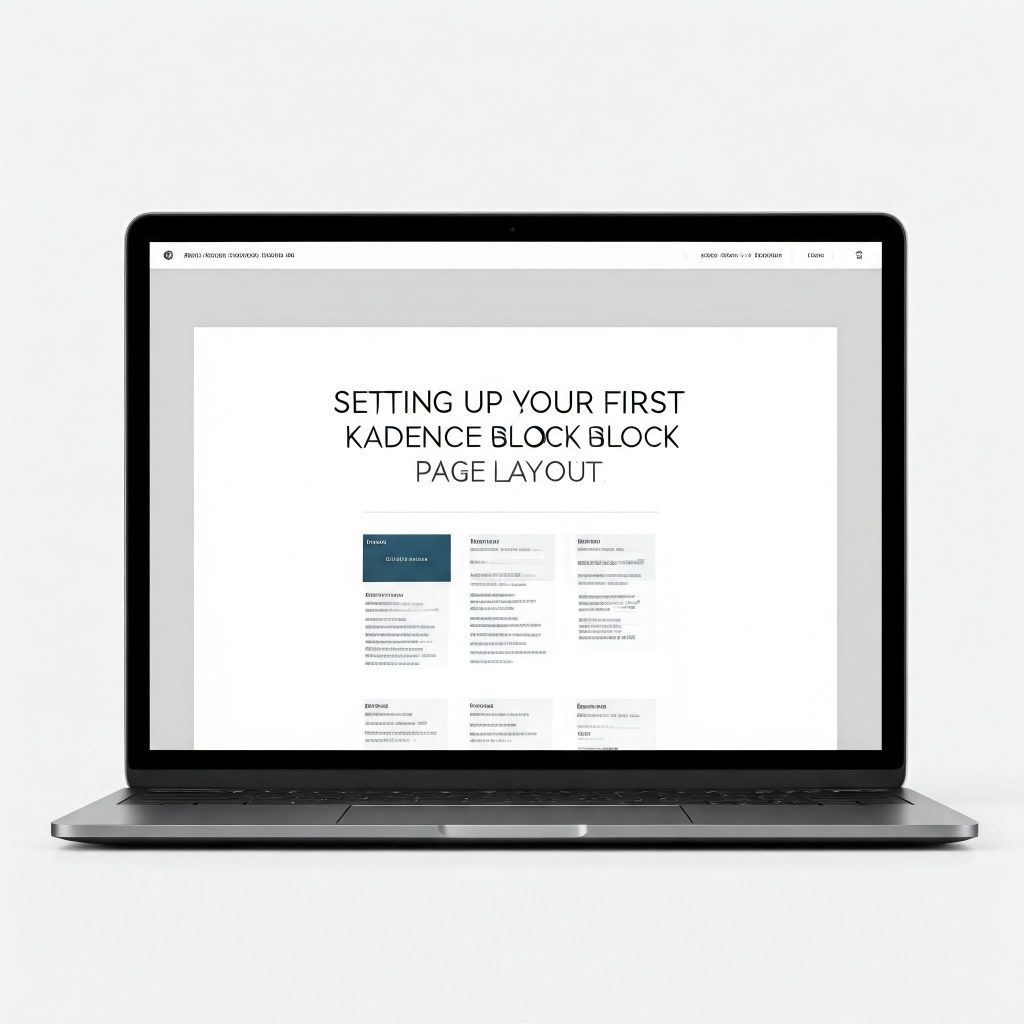
Now that you’re familiar with Kadence Blocks and know how to navigate its interface, it’s time to take action and set up your first page layout. This step is all about putting the tools you’ve learned into practice by creating your very first custom design using Kadence Blocks. Don’t stress—this step is beginner-friendly, and we’ll break it down into simple, manageable actions.
Setting up your first layout will give you the confidence to explore more advanced features in future steps, so let’s get started! 🚀
Start with a New Page or Edit an Existing One
The first thing you’ll need to do is decide whether you want to build a new page from scratch or edit an existing page. Here’s how:
- Go to your WordPress Dashboard.
- Navigate to Pages > Add New to start fresh or select an existing page from Pages > All Pages to make changes.
- Once you’re on the WordPress editor screen, you’re ready to begin building with Kadence Blocks.
You’ll notice that the block editor interface looks simple, but with Kadence Blocks, you’ll have access to advanced options that let you design layouts visually and efficiently.
Add Your First Kadence Block
Next, it’s time to add your first Kadence Block. Follow these steps:
- Click the + icon in the WordPress editor to add a new block.
- Use the Search Bar to look for Kadence Blocks. For example, you can search for Row Layout Block to create rows on your page or Button Block to add clickable buttons.
- Select the block you want and click to insert it into the editor.
The Row Layout Block is a great choice for beginners. It allows you to divide your page into columns and create a clean, organized structure for content like images, text, or CTAs.
Organize Your Content with Rows & Columns
Once you’ve added a Row Layout Block, you can configure it to create multiple columns and organize content visually. Here’s how:
- Select the Row Block you added.
- Look for the Layout Settings in the Kadence toolbar at the top. Here you can set the number of columns you want to divide your row into (e.g., 2, 3, or 4).
- Drag and drop different blocks (like text, images, or buttons) into each of these columns.
Example: Create a 3-column layout with one column for an image, one for a brief introductory paragraph, and the third for a call-to-action button.
Customize Your Blocks for a Unique Look
Kadence Blocks makes customization easy. Once you’ve added your Row and Column structures, play with the settings to make your design visually appealing:
- Set Background Colors or Gradients: Click on your block, go to the Kadence Blocks toolbar, and select the background color or gradient option.
- Adjust Spacing: Change the padding and margins to give elements room to breathe and look organized.
- Add Visibility Options: Want specific blocks to show only on mobile devices? Kadence makes that possible with visibility settings.
These design features are user-friendly and can make a huge difference in how your layout looks on the front end.
Add More Blocks to Build Your Page
Once you have your basic row and column structure set up, you can add more Kadence Blocks to make your page engaging and interactive. Some popular blocks to try include:
- Button Block: Call-to-action buttons are essential for encouraging user interaction.
- Slider Block: Showcase multiple images or key promotions with a beautiful slider.
- Gallery Block: Add visual interest by displaying product images, portfolios, or slideshows.
- Testimonial Block: Highlight positive reviews to build trust with your audience.
By dragging and dropping these blocks into your layout and configuring their settings, you can create pages that align with your goals and user expectations.
Preview Your Design
After setting up your blocks and customizing them, always preview your page to ensure everything looks and works the way you expect. Here’s how to preview:
- Click the Preview button located at the top of the editor.
- View your page in mobile and desktop modes to ensure responsiveness.
Kadence Blocks is mobile-responsive by default, but it’s always a good idea to double-check your design across different devices.
Save Your Progress
Once you’re happy with your page layout, save your changes by clicking Save Draft or Publish. This ensures that you can return to your design later and make adjustments as needed.
What’s Next?
Now that you’ve successfully created your first Kadence Block page layout, you’re ready to build upon this foundation. As you become more comfortable with tools like rows, columns, sliders, and buttons, you’ll discover how much you can customize with Kadence Blocks.
In the next step, we’ll explore how to fine-tune your design by learning about additional features and advanced customization settings.
Keep practicing, experimenting, and designing—you’re on your way to becoming a Kadence Blocks pro!
Step 4: Customizing Your Kadence Block Designs
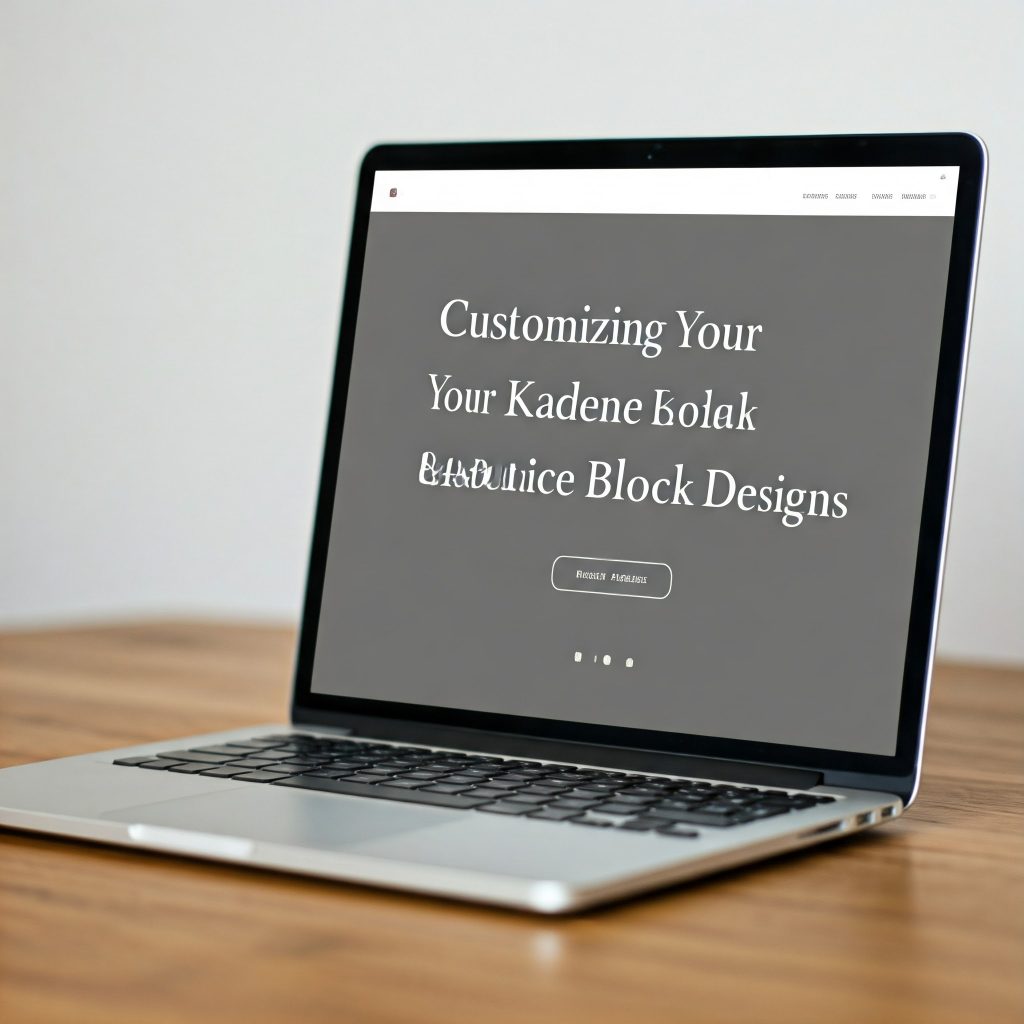
Now that you’ve set up your first Kadence Block page layout and added rows and columns, it’s time to dive into customizing your design. Customization is what allows you to make your website unique and aligned with your brand identity. Kadence Blocks makes it simple to style your elements and design your website visually without needing to touch a single line of code.
Whether you want to change colors, adjust spacing, or add animations, this step will show you how to customize your blocks to make your page stand out. Let’s break it down!
Explore the Block Toolbar Options
When you select any Kadence Block in the editor, the Kadence Blocks Toolbar will appear at the top of the page editor. This toolbar gives you access to a wide variety of options to style and tweak your selected block. Let’s explore what you can do:
- Color Options:
Change the background and text colors for the block to match your brand or website theme. This includes solid colors or even gradients. - Padding and Margin Settings:
Adjust the space inside (padding) and outside (margin) your block to create breathing room and proper alignment on your page. - Typography Settings:
Customize the font style, size, line height, letter spacing, and more. This allows you to maintain consistent typography across your entire design. - Advanced Options:
If you’re looking for even more control, Kadence Blocks has advanced settings for visibility, animations, responsiveness, and more.
By learning these features, you can ensure each design choice enhances the user experience and improves visual appeal.
Use Background Colors & Gradients to Add Visual Appeal
Backgrounds can completely transform the look of a block. Kadence Blocks allows you to set solid background colors or create dynamic gradient backgrounds that catch the eye. Here’s how to do it:
- Select the block you want to edit.
- Look for the Background Color/Gradient Option in the toolbar.
- Choose your desired color or gradient.
Experiment with color combinations that align with your website’s branding or the mood you want to convey. For example, a light blue gradient can add a calming effect, while a bold red background can draw attention.
Set Up Visibility for a Personalized User Experience
Kadence Blocks also allows you to control visibility settings for individual blocks. This is particularly useful if you want certain content to show only on specific devices (mobile, tablet, or desktop). Here’s how:
- Select the block you want to adjust.
- Look for the Visibility settings in the Kadence toolbar.
- Choose whether to hide or show the block on certain devices.
This feature ensures that your design looks great across all devices while maintaining a clean and streamlined user experience.
Add Animations to Enhance Engagement
Animations are a fantastic way to grab attention and make your website interactive. Kadence Blocks offers several animation options, such as:
- Fade-In: Elements appear gradually as users scroll.
- Slide-In: Blocks slide into view for an engaging effect.
- Bounce Effects: Add dynamic movement to key elements.
Here’s how to add animations:
- Select the block you want to animate.
- Go to the Advanced Options in the toolbar.
- Choose the animation effect that best suits the content or design intent.
Animations should be used sparingly to avoid overwhelming visitors, but they can add personality to your layout when applied correctly.
Customize Responsiveness for All Devices
Kadence Blocks automatically adjusts content for mobile devices, but you can fine-tune settings manually if needed. In the Advanced Options menu, you can adjust:
- Column Visibility on Mobile: Decide if specific columns should or should not appear on smaller screens.
- Padding/Margin Adjustments: Ensure everything looks visually appealing across all screen sizes by tweaking space settings for responsiveness.
These adjustments ensure a seamless and user-friendly experience for mobile users, improving your website’s usability.
Save Your Changes & Preview
Once you’ve customized your design by experimenting with colors, backgrounds, animations, typography, visibility, and responsiveness, save your changes.
- Click Save Draft or Publish depending on your goals.
- Use the Preview button to see how your design looks on the front end of your website.
The preview allows you to ensure your changes look exactly how you intended and that they’re optimized across devices.
Why Customization Matters
Customizing your Kadence Blocks isn’t just about making your site visually appealing—it’s also about creating a website that reflects your brand, engages your audience, and provides a seamless user experience. The design elements you add, from animations to colors, contribute to a professional and inviting first impression for your visitors.
Take your time with this step. Experiment, learn, and try different styles to discover what works best for your brand and website goals.
What’s Next?
Now that you’ve learned how to customize your Kadence Block designs, you’re on your way to creating a unique and personalized website experience. In the next step, we’ll explore how to integrate advanced features into your page, like sliders, buttons, forms, and more—expanding your ability to create an interactive and engaging website.
Keep experimenting with Kadence Blocks, and remember—every change you make brings you one step closer to mastering advanced layouts!
Step 5: Integrating Dynamic Content with Kadence Blocks
Now that you’re comfortable with customizing the layout and design using Kadence Blocks, it’s time to explore how to integrate dynamic content into your pages. Dynamic content refers to information that can change based on the user’s interaction, data, or context, providing an engaging and personalized experience for your audience. With Kadence Blocks, you can easily incorporate dynamic elements into your website without needing coding expertise.
Dynamic content can include items like testimonials, product displays, recent blog posts, sliders, or interactive call-to-actions. These features keep your site fresh, interactive, and highly functional. Let’s break this step down and show you how to add dynamic content with ease!
Start with the Testimonial Block
One of the easiest ways to incorporate dynamic content is by adding a Testimonial Block. This allows you to showcase reviews or feedback from your satisfied customers, which builds trust with visitors. Here’s how to add it:
- In the WordPress editor, click the + icon to add a new Kadence Block.
- Search for Testimonial Block using the search bar.
- Select and add it to your layout.
Once added, you can configure the block by entering review text, author names, images, and even star ratings. This helps establish credibility and gives your users social proof.
Add a Product Slider
If you run an eCommerce website or want to highlight key services, Sliders are an effective way to showcase multiple items or messages. Kadence Blocks allows you to add dynamic sliders that are easy to configure and visually appealing:
- Click the + icon and search for the Slider Block.
- Add the block to your page and upload images or set up slide content for product features, promotions, or other key visuals.
- Customize transition effects, speed, and controls from the block settings menu.
A well-designed slider can increase engagement, direct users toward promotions, and visually enhance your homepage.
Embed Blog Posts with the Post Block
Displaying your latest blog posts dynamically is another great way to keep your content fresh and give your audience more opportunities to interact with your site. Kadence Blocks provides an easy way to embed blog post grids into your homepage.
- Search for the Post Block in the block library.
- Drag it onto your page layout and select categories or tags you want to pull posts from.
- Adjust the number of posts, layout style, or design features to fit your website’s aesthetic.
With this feature, your blog visitors can easily access your latest posts, driving engagement and improving SEO.
Interactive Call-To-Action Buttons
Dynamic CTAs (calls-to-action) are crucial for driving conversions, whether that means encouraging visitors to subscribe to your newsletter, view a product, or contact your business. Kadence Blocks allows you to design sleek and interactive buttons:
- Click the + icon and search for the Button Block.
- Customize your button’s text, link, and style.
- Adjust colors, hover effects, and size to make the CTA visually appealing.
Well-placed, visually dynamic CTAs can increase conversions and keep users navigating your website.
Why Dynamic Content Matters
Dynamic content is important because it creates interactivity and relevance for your website visitors. By integrating elements like testimonials, sliders, post grids, and interactive CTAs, you’re creating a personalized browsing experience. These elements:
- Help keep your site fresh and updated automatically.
- Improve user engagement by offering interactive opportunities.
- Build trust through user reviews and feedback.
- Enhance the overall user journey by aligning content with user needs.
Kadence Blocks’ ease of use makes implementing these dynamic features accessible—even if you’re a beginner!
Save Your Progress
Once you’ve successfully added dynamic elements, always preview your changes to ensure everything looks great. Use the Preview button to see how the dynamic content appears on the front end of your site.
Make adjustments if necessary, and once you’re happy with the final result, save your progress.
Next Steps
Now that you know how to integrate dynamic content into your Kadence Blocks layouts, you’re well on your way to creating an engaging, interactive, and functional website. The next step will show you how to optimize these features further by setting up animations, advanced visibility, and creating advanced user interactions for a polished and seamless user experience.
Keep experimenting with these blocks and have fun building your dynamic website!
Step 6: Optimizing Your Kadence Blocks for Performance
Now that you’ve designed and added dynamic content to your website with Kadence Blocks, it’s time to focus on performance optimization. Performance is key to ensuring your website loads quickly, provides a smooth user experience, and ranks well in search engines. With Kadence Blocks, optimizing your design is easier than you think, even if you’re a complete beginner.
Optimizing your website ensures that visitors don’t leave because of slow loading speeds. It can also improve SEO, mobile usability, and overall user satisfaction. Let’s dive into simple but effective ways to optimize your Kadence Blocks for peak performance!
1. Enable Lazy Loading for Images and Media
One of the most common reasons websites slow down is due to large images or media files loading all at once. Lazy loading allows images and media to load only when a user scrolls to them, reducing the initial load time of your website.
Here’s how you can set up lazy loading with Kadence Blocks:
- Navigate to the Media Options in the Kadence Toolbar.
- Look for the Lazy Loading setting.
- Enable it for all images or sliders on your page.
This small tweak can dramatically improve how quickly your pages load without compromising the user experience.
2. Minimize Block Overhead
While Kadence Blocks is incredibly intuitive, having too many blocks on a single page can weigh down performance. This is especially true if you’re adding many sliders, dynamic grids, or other complex elements. Here’s how you can manage this:
- Only add the essential Kadence Blocks to your layout.
- Avoid unnecessary widgets or animations unless they’re necessary for the user journey.
Keeping your website lean ensures faster loading speeds and keeps your pages performing smoothly.
3. Optimize Your Code with Performance Tools
Kadence Blocks is built with clean and efficient code. However, combining it with website performance tools like WP Rocket or W3 Total Cache can give your website an extra performance boost. These tools can help:
- Minimize CSS and JavaScript.
- Enable caching for faster page loading.
- Optimize database performance.
If you’re new to these tools, they have beginner-friendly guides and setup processes that are easy to follow.
4. Use a Content Delivery Network (CDN)
A Content Delivery Network (CDN) is a group of servers distributed across different locations. It helps deliver your website’s files from the nearest server to the user’s location, improving loading speed.
Popular CDN options you can use are Cloudflare, StackPath, or your hosting provider’s CDN tools. Integrating a CDN with your Kadence Blocks website ensures that content, images, and media are loaded quickly, no matter where the visitor is located.
5. Optimize Images for Faster Load Times
Images are essential to every website, but they can also slow things down if they aren’t optimized. Large, uncompressed images consume a lot of bandwidth. Here’s how you can optimize images:
- Use tools like TinyPNG or ImageOptim to compress images.
- Resize images to their actual display dimensions using Kadence Block’s Image Settings or WordPress’s built-in media library.
- Choose modern image formats like WebP, which are compressed but still maintain great quality.
Optimized images are a simple yet powerful way to reduce load time and bandwidth usage.
6. Review Animations and Transitions
Animations add personality to your website but can sometimes weigh it down if overused. If your animations are smooth but affect performance, try tweaking their settings:
- Reduce animation duration to make transitions faster.
- Limit the number of effects on a single page.
Kadence Blocks makes animations accessible, but focusing on performance will ensure the animations don’t slow users down.
7. Regularly Update Your Theme and Plugins
Always make sure that your Kadence Theme and all plugins are updated. Updates include bug fixes, compatibility improvements, and performance enhancements that keep your site running smoothly.
- Go to Appearance > Themes or Plugins > Installed Plugins in your WordPress Dashboard.
- Check for updates and install them.
Outdated plugins and themes can introduce vulnerabilities and compatibility issues that may negatively impact website performance.
8. Test Your Site Speed Regularly
To monitor performance, use tools like:
- Google PageSpeed Insights
- GTmetrix
- Pingdom Tools
These tools can analyze your website’s speed and suggest actionable improvements. Run your website through these testing tools periodically to identify potential performance issues.
Why Performance Optimization Matters
Optimizing your Kadence Blocks for performance isn’t just about improving site speed—it’s also about user experience, SEO rankings, and mobile usability. A well-optimized website keeps visitors engaged, reduces bounce rates, and ensures your content is accessible across devices.
By following the strategies mentioned above, you’ll create a seamless browsing experience for your visitors and stay ahead of the competition.
Next Steps
With performance optimization completed, your website should load quickly and function flawlessly. In the next step, we’ll explore how to integrate advanced SEO techniques with Kadence Blocks to ensure your website ranks high in search engines and reaches a broader audience.
Keep learning and building with Kadence Blocks—you’re on the path to creating a stunning, fast, and effective website!
Step 7: Customizing Mobile Responsiveness with Kadence Blocks
In today’s digital world, mobile responsiveness is no longer optional—it’s essential. With so many users accessing websites through smartphones and tablets, ensuring that your site looks great and functions well on every device is critical. Thankfully, Kadence Blocks makes mobile optimization straightforward, even for beginners.
Kadence Blocks comes with powerful options that allow you to design a website that works seamlessly across desktops, tablets, and smartphones. This step will show you how to make your website mobile-friendly by fine-tuning your design elements for responsiveness.
1. Utilize Kadence’s Responsive Editing Options
Kadence Blocks comes with responsive editing tools that allow you to adjust design settings for different screen sizes directly within the WordPress editor. Here’s how to use them:
- Select the block you want to edit.
- Look for the Responsive tab in the block settings menu.
- You’ll find options to hide blocks on certain devices or adjust properties like margins, padding, and alignment specifically for mobile or tablet view.
For instance, you can change the text size for smaller devices, adjust spacing, or even hide certain elements on smaller screens to optimize the user experience.
2. Adjust Text and Font Sizes for Mobile Users
Text that looks good on a desktop screen might become too small or too large on mobile devices. Kadence Blocks allows you to change text settings based on device types. Here’s how:
- Select a Text Block or Heading Block.
- Navigate to the Typography settings in the block editor.
- Set unique font sizes for different devices (desktop, tablet, mobile).
This ensures the text remains readable regardless of the device your visitors are using.
3. Customize the Layout for Smaller Screens
Layouts that look great on desktop browsers might not translate well to mobile devices. Kadence Blocks allows you to rearrange layouts so they’re user-friendly on smaller devices. Here’s how:
- Use the Column Block settings. You can stack columns vertically on mobile while keeping them side-by-side on desktops.
- Adjust column widths responsively using the column settings menu.
- Change spacing and alignment to make sure everything fits neatly on smaller screens.
With responsive design, you’re ensuring that your website looks intuitive and professional for every user.
4. Test Your Mobile Site with the Preview Mode
WordPress and Kadence Blocks offer preview modes that allow you to see how your design looks on different devices:
- Click the Preview button in the top right corner of the WordPress editor.
- Switch between the mobile, tablet, and desktop views.
- Make adjustments as needed to ensure everything looks great and works well.
Regular testing can reveal design issues that you might have missed during editing.
5. Ensure Mobile-Friendly Navigation
Navigation is crucial on mobile devices. Kadence Blocks offers mobile-optimized menus and navigation options. Here’s how you can make your menus user-friendly:
- Use Kadence’s Navigation Menu Block and design it to be responsive.
- Ensure menus are easy to access and have visible call-to-action buttons.
- Simplify menu options for mobile users by prioritizing important pages.
Having a clean, mobile-responsive navigation system makes it easier for users to explore your website, leading to better engagement and conversions.
6. Optimize Media for Mobile Viewing
Images, videos, and media content can also impact mobile performance. Ensure the following:
- Optimize images for faster mobile loading using compression tools like TinyPNG or ImageOptim.
- Resize and format images to fit well on smaller screens without distortion.
- Use Kadence Blocks’ Image Block settings to tailor media displays for mobile devices.
This reduces load times and ensures your visual content is visually appealing across all devices.
Why Mobile Responsiveness Matters
With over 50% of web traffic coming from mobile devices, ensuring a responsive design is crucial. A mobile-optimized website leads to better user experiences, lower bounce rates, and improved SEO rankings. Google and other search engines prioritize mobile-friendly websites in search results, so optimizing for mobile isn’t just user-friendly—it’s necessary for search visibility.
Next Steps
Once you’ve customized your website’s mobile responsiveness using Kadence Blocks, you’re one step closer to building a user-friendly, SEO-optimized site. Next, we’ll explore how to integrate advanced SEO strategies with Kadence’s features to help your site rank higher and attract more visitors.
With mobile responsiveness in place, your visitors will enjoy a seamless browsing experience on any device. Let’s keep building!
Step 8: Enhancing User Experience with Kadence Theme’s Advanced Features
User experience (UX) is the backbone of any successful website. A well-designed, intuitive, and engaging site keeps visitors on your pages longer and improves your chances of conversions, whether you’re running an eCommerce store, a blog, or a business site. Kadence Theme offers several advanced features to ensure your visitors have an exceptional user experience, regardless of how they interact with your site.
In this step, we’ll explore how you can use Kadence’s advanced features to make your website more user-friendly, visually appealing, and functional for your audience.
1. Leverage Kadence’s Header and Footer Options
Your website’s header and footer are two of the most important sections for navigation and brand identity. Kadence Theme makes it easy to customize these sections with intuitive drag-and-drop options:
- Header Builder: Create responsive headers that include menus, logos, social media links, and search bars. Kadence’s Header Builder allows you to design a unique header that aligns with your brand.
- Footer Builder: Add widgets, contact information, and links to your footer to ensure your visitors can quickly access key pages or resources.
Both are vital elements for UX, as users expect intuitive navigation and a clean design to explore your site with ease.
2. Use the Kadence Starter Templates
If you’re new to website design or want to save time, Kadence Starter Templates are pre-built website designs that you can import and customize with just a few clicks. These templates are professionally designed to include the best UX practices, responsive layouts, and optimized features.
To get started:
- Go to Appearance > Kadence Starter Templates in your WordPress dashboard.
- Browse through various templates based on your niche.
- Import the one that fits your vision and customize it to make it your own.
Starter templates save time and reduce the learning curve for beginners while giving you a solid starting point for designing an intuitive website.
3. Optimize the Site’s Navigation
Kadence’s advanced navigation features allow you to create intuitive and user-friendly menus. A smooth navigation experience helps visitors find the content they want quickly, reducing bounce rates. With Kadence, you can:
- Create Mega Menus: These allow you to showcase categories, subcategories, and links in a clean, dropdown interface that is accessible and user-friendly.
- Make Menus Responsive: Kadence ensures menus adjust perfectly for mobile devices, creating a seamless mobile navigation experience.
Make sure navigation is straightforward, responsive, and intuitive so visitors can explore your site without confusion.
4. Implement Call-to-Action (CTA) Buttons
A well-placed Call-to-Action (CTA) can significantly enhance user engagement and conversions. Kadence Theme offers customizable button blocks that are visually appealing and easy to configure. Whether you want visitors to sign up for your newsletter, contact you, or make a purchase, CTA buttons should be:
- Easy to find on the page.
- Styled consistently to align with your website’s theme.
- Designed to stand out with bold colors and clear messaging.
Kadence Blocks makes it simple to add buttons with customized colors, sizes, and hover effects, making them effective and engaging.
5. Add Interactive Features with Kadence Blocks
Interactive design elements make a website feel dynamic and engaging, keeping users interested. Kadence Blocks provides features like:
- Accordion Sections: Perfect for FAQs, guides, or reducing visual clutter. They allow users to click to reveal content without overwhelming the page.
- Tabs: Ideal for organizing content like product information, features, or other grouped categories.
- Testimonials & Review Sliders: Social proof is a powerful motivator. Kadence Blocks allow you to add sliders for user reviews or customer testimonials that add credibility and trustworthiness.
These interactive blocks are beginner-friendly and add functionality without requiring custom coding.
6. Optimize for Accessibility
Accessibility ensures that all visitors, regardless of disabilities, can easily interact with your website. Kadence provides features to enhance accessibility by focusing on:
- Clear, easy-to-read typography settings.
- Proper contrast for text and backgrounds to improve visibility.
- Keyboard navigation compatibility, allowing users to navigate without relying on a mouse.
Implementing accessibility features makes your website inclusive, while also improving your website’s SEO performance.
Why Advanced Features Improve UX
Kadence’s advanced features—ranging from intuitive navigation options to interactive blocks and accessibility settings—are all designed with UX in mind. A well-optimized site that prioritizes the user experience ensures visitors can:
- Quickly find the content they’re looking for.
- Have a visually appealing and seamless experience across devices.
- Interact with intuitive menus, CTA buttons, and sliders.
When you implement these features effectively, you create an environment that keeps users engaged and coming back.
Next Steps
Now that you’ve optimized your site for a better user experience, you’re ready to focus on SEO, performance, and conversion strategies. The next step will help you connect Kadence features with advanced SEO techniques so your website can rank higher in search results and attract organic traffic.
With Kadence’s advanced features and your creativity, you can create a professional, intuitive, and engaging website that delights visitors and supports your goals. Keep building and exploring![Kadence Blocks for Advanced Page Layouts][Kadence Blocks for Advanced Page Layouts][Kadence Blocks for Advanced Page Layouts]
Step 9: Analyzing Your Website’s Performance with Kadence Analytics

Once you’ve designed and customized your website with Kadence Theme and Kadence Blocks, the next step is to ensure your website performs at its best. Website performance directly impacts user experience, search engine rankings, and conversions. Slow-loading pages, broken links, or poor responsiveness can lead to frustrated users and higher bounce rates. Fortunately, Kadence provides advanced analytics and performance tools that can help you monitor and optimize your website effectively.
Let’s dive into how you can use Kadence Analytics to track, analyze, and improve your site’s performance.
1. Understand the Importance of Website Performance
Website performance encompasses factors like loading speed, responsiveness, mobile usability, and smooth navigation. Users expect fast, efficient, and seamless experiences, and website performance plays a key role in meeting these expectations. Additionally:
- Google prioritizes fast-loading, responsive websites in its search results.
- Faster websites lead to better user engagement and lower bounce rates.
- Performance insights help identify bottlenecks, allowing you to optimize page elements.
Kadence’s built-in analytics provide insights into your site’s performance so you can identify and fix issues before they impact your audience.
2. Set Up Kadence Analytics on Your Website
Kadence Analytics integrates directly with WordPress, giving you an all-in-one performance tracking solution. Here’s how you can set it up:
- Navigate to your WordPress Dashboard.
- Go to Kadence > Analytics (or a similar menu depending on your setup).
- Connect Kadence Analytics with your website to track key performance metrics.
Once set up, Kadence Analytics will begin tracking your site’s data, including user behavior, site speed, and conversion tracking.
3. Monitor Key Performance Metrics
Kadence Analytics allows you to track important metrics that provide insights into how your site is performing:
- Page Load Speed: Kadence shows how fast individual pages load on both mobile and desktop. Slow-loading pages are a major cause of user drop-off, so aim for loading times under 3 seconds.
- User Engagement: Analyze metrics like time spent on pages, click-through rates, and bounce rates to assess how engaging your content is.
- Traffic Sources: See where your visitors are coming from—whether from search engines, social media, or other referral links. This information can guide your content strategy.
- Conversion Rates: Track how many visitors complete specific actions (like signing up for newsletters or purchasing a product) to determine if your website design and calls-to-action are effective.
Kadence Analytics makes it easy to visualize these insights with graphs and reports.
4. Identify Problem Areas
With the data from Kadence Analytics, you can identify areas where your website’s performance may be lacking:
- Pages with High Bounce Rates: If certain pages have high bounce rates, it may indicate that users aren’t finding what they’re looking for or that the page takes too long to load.
- Slow-Loading Content: Large images, poorly optimized code, or too many plugins can slow down pages. Use Kadence’s insights to pinpoint slow-loading elements.
- Low Conversion Rates: If visitors aren’t taking the actions you want (e.g., making a purchase, signing up, or exploring your services), your CTAs or website design may need adjustments.
Identifying these issues allows you to take targeted steps to optimize your site.
5. Take Action with Insights from Kadence Analytics
After gathering insights, the next step is optimization. Here are common ways to fix performance issues:
- Optimize Images: Use tools to compress large images without sacrificing quality. Kadence’s settings allow you to manage image sizes easily.
- Minimize HTTP Requests: Remove unnecessary plugins or scripts to streamline code and reduce load times.
- Implement Caching: Use caching plugins to ensure that returning visitors experience faster load speeds.
- Optimize Website Design: Review your layout and design choices to ensure they’re responsive, mobile-friendly, and minimalistic.
Kadence Analytics will give you actionable insights, helping you focus on the most pressing performance issues.
6. Regularly Review Analytics for Continuous Improvement
Website performance is an ongoing process. Kadence Analytics isn’t just a one-time tool; you should regularly review the metrics to monitor changes, track improvements, and detect new issues. Regularly analyzing your data allows you to:
- Compare performance over time.
- Monitor the effects of design or content changes.
- Adapt to new trends in user behavior or technology.
Continuous improvement ensures that your website stays fast, user-friendly, and competitive.
Why Analyze Website Performance?
Analyzing your website’s performance isn’t just about numbers and graphs. It translates into real user experience. Faster pages, intuitive navigation, engaging design, and optimized responsiveness all lead to happier users who are likely to return to your website and recommend it to others. Kadence Analytics gives you the insights you need to ensure that your visitors are having the best possible experience.
By leveraging this feature, you’re setting your website up for better user engagement, improved SEO rankings, and higher conversions.
Next Steps
[Kadence Blocks for Advanced Page Layouts][Kadence Blocks for Advanced Page Layouts][Kadence Blocks for Advanced Page Layouts][After setting up your Kadence Analytics and analyzing your site’s performance, you’ll be equipped with the tools to make data-driven decisions. The next step will involve diving deeper into advanced SEO strategies, content strategy improvements, and performance tweaks that will complement your data insights.
Kadence Analytics empowers you to make smart, strategic adjustments that align with your website goals. With the right optimizations, your website will load faster, rank higher, and create an enjoyable user experience for all visitors. Let’s keep improving![Kadence Blocks for Advanced Page Layouts][Kadence Blocks for Advanced Page Layouts][Kadence Blocks for Advanced Page Layouts]
Step 10: Testing, Debugging, and Launching Your Kadence Website
Congratulations! You’ve now customized, optimized, and analyzed your Kadence website, following all the necessary steps to build a functional and visually appealing site. Before you hit that “Publish” or “Launch” button, it’s essential to go through the final steps of testing, debugging, and making sure everything is working as expected. These final checks ensure that your visitors have a smooth and seamless experience from the moment they visit your website.
Let’s explore how you can effectively test your site, debug any potential issues, and prepare for a successful launch.
1. Test Your Website’s Performance Across Multiple Devices
User experience is a critical component of website success. Since users will access your website from various devices (mobile, tablet, desktop), you must ensure it looks and functions well across all of them. Here’s how you can do that:
- Mobile Responsiveness: Kadence Theme is responsive by default, but test your site on multiple screen sizes to ensure all elements look great and are functional.
- Cross-Browser Testing: Visit your website on different browsers like Chrome, Firefox, Safari, and Edge to ensure compatibility.
- Viewport Testing: Simulate various screen sizes using browser tools (like Chrome DevTools) to verify design responsiveness.
A seamless mobile and cross-browser experience ensures all users find your site professional and easy to navigate.
2. Debug Common Errors and Issues
Even after optimizing, there may be some small glitches. Take time to debug these common issues:
- Broken Links: Use tools to scan your site for broken links. Broken links frustrate users and hurt your SEO.
- Loading Time Issues: If you notice slow performance, revisit image optimization, caching, or plugin-related issues.
- Responsive Issues: Ensure buttons, images, and menus work properly on all devices.
- Form Testing: If you have contact or lead forms, test them thoroughly to ensure submissions are functioning properly.
Debugging allows you to identify and fix these small, often-overlooked issues that could hinder your website’s performance.
3. Test Forms, CTAs, and Interactive Elements
You’ve likely included buttons, contact forms, and interactive Kadence elements on your site. Before launching, ensure these work perfectly:
- Form Submissions: Test any contact forms, subscription boxes, or other input fields to confirm they submit correctly.
- CTA Buttons: Click through all call-to-action buttons to verify they lead users to the intended destinations.
- Interactive Blocks: Test Kadence interactive blocks like sliders, accordions, or tabs to ensure they function as intended.
These elements must work flawlessly to ensure visitors can engage with your site without frustration.
4. Review SEO Settings and Metadata
Now that your design is in place and optimized, double-check your SEO settings. Use tools like Yoast SEO or Rank Math to ensure:
- Your meta titles, descriptions, and keywords are optimized.
- Your URLs are user-friendly and keyword-optimized.
- Alt text is added to images to improve accessibility and SEO.
These last-minute adjustments can dramatically improve your ability to rank in search engines after launch.
5. Create a Backup Before You Launch
Before you make your website live, always create a complete backup. Use a WordPress backup plugin (like UpdraftPlus or Jetpack Backup) to save all of your data. This precaution ensures that if anything goes wrong during launch or post-launch, you can quickly restore your site.
6. Gather Feedback
If possible, share your site with a small group of trusted friends, colleagues, or beta testers. Their feedback can uncover usability issues, design flaws, or user experience problems that you might have missed. Incorporate their feedback into the final adjustments to ensure your website offers a polished, user-friendly experience.
7. Hit the Launch Button!
After all the testing and debugging, you’re ready to go live! Ensure you’ve completed all of the following:
- Your site design is complete and responsive.
- Performance and SEO optimization are finished.
- Forms, CTAs, and interactive features are fully functional.
- You’ve thoroughly tested and debugged your site.
When everything is in place, it’s time to publish your website and share it with the world.
8. Monitor Post-Launch Activity
After launching your website, your job isn’t over. Keep monitoring your website’s performance and user behavior using tools like Kadence Analytics, Google Analytics, or other SEO tools. Look for:
- Changes in user behavior.
- Loading time issues.
- Conversion rates and engagement patterns.
Regular monitoring allows you to make incremental changes and adjustments, ensuring your website continues to meet your goals.
Final Thoughts
[Kadence Blocks for Advanced Page Layouts][Kadence Blocks for Advanced Page Layouts][Kadence Blocks for Advanced Page Layouts]Launching your Kadence website is an exciting milestone! Testing, debugging, and preparation might seem tedious, but they are critical for providing your visitors with the best possible user experience. Once your website is live, you can focus on driving traffic, creating content, engaging with your audience, and optimizing your site further.
With all the hard work you’ve put into designing and optimizing your Kadence website, you’re now equipped with a professional, functional, and user-friendly platform. Here’s to your website’s success![Kadence Blocks for Advanced Page Layouts][Kadence Blocks for Advanced Page Layouts][Kadence Blocks for Advanced Page Layouts]
NEXT TOPIC : Kadence Theme vs Competitors: Why It’s Perfect for Bloggers

